| This article may need cleanup to meet quality standards.
Please help improve this if you can. The Discussion page may contain suggestions. |
Please help improve this if you can. The Discussion page may contain suggestions.
Reason: "Duplicated information needs to be combined"
This page shows the Hidden Treasures from the Time Rift levels.


Time Rift Events and Trials[]
Today, I'd like to introduce one of Langrisser Mobile's most distinctive gameplay features – The Time Rift!
Classic scenarios from Langrisser’s past are back to boggle your mind and put your strategic prowess to the test once again! Are you ready to see what challenges await in Langrisser Mobile?
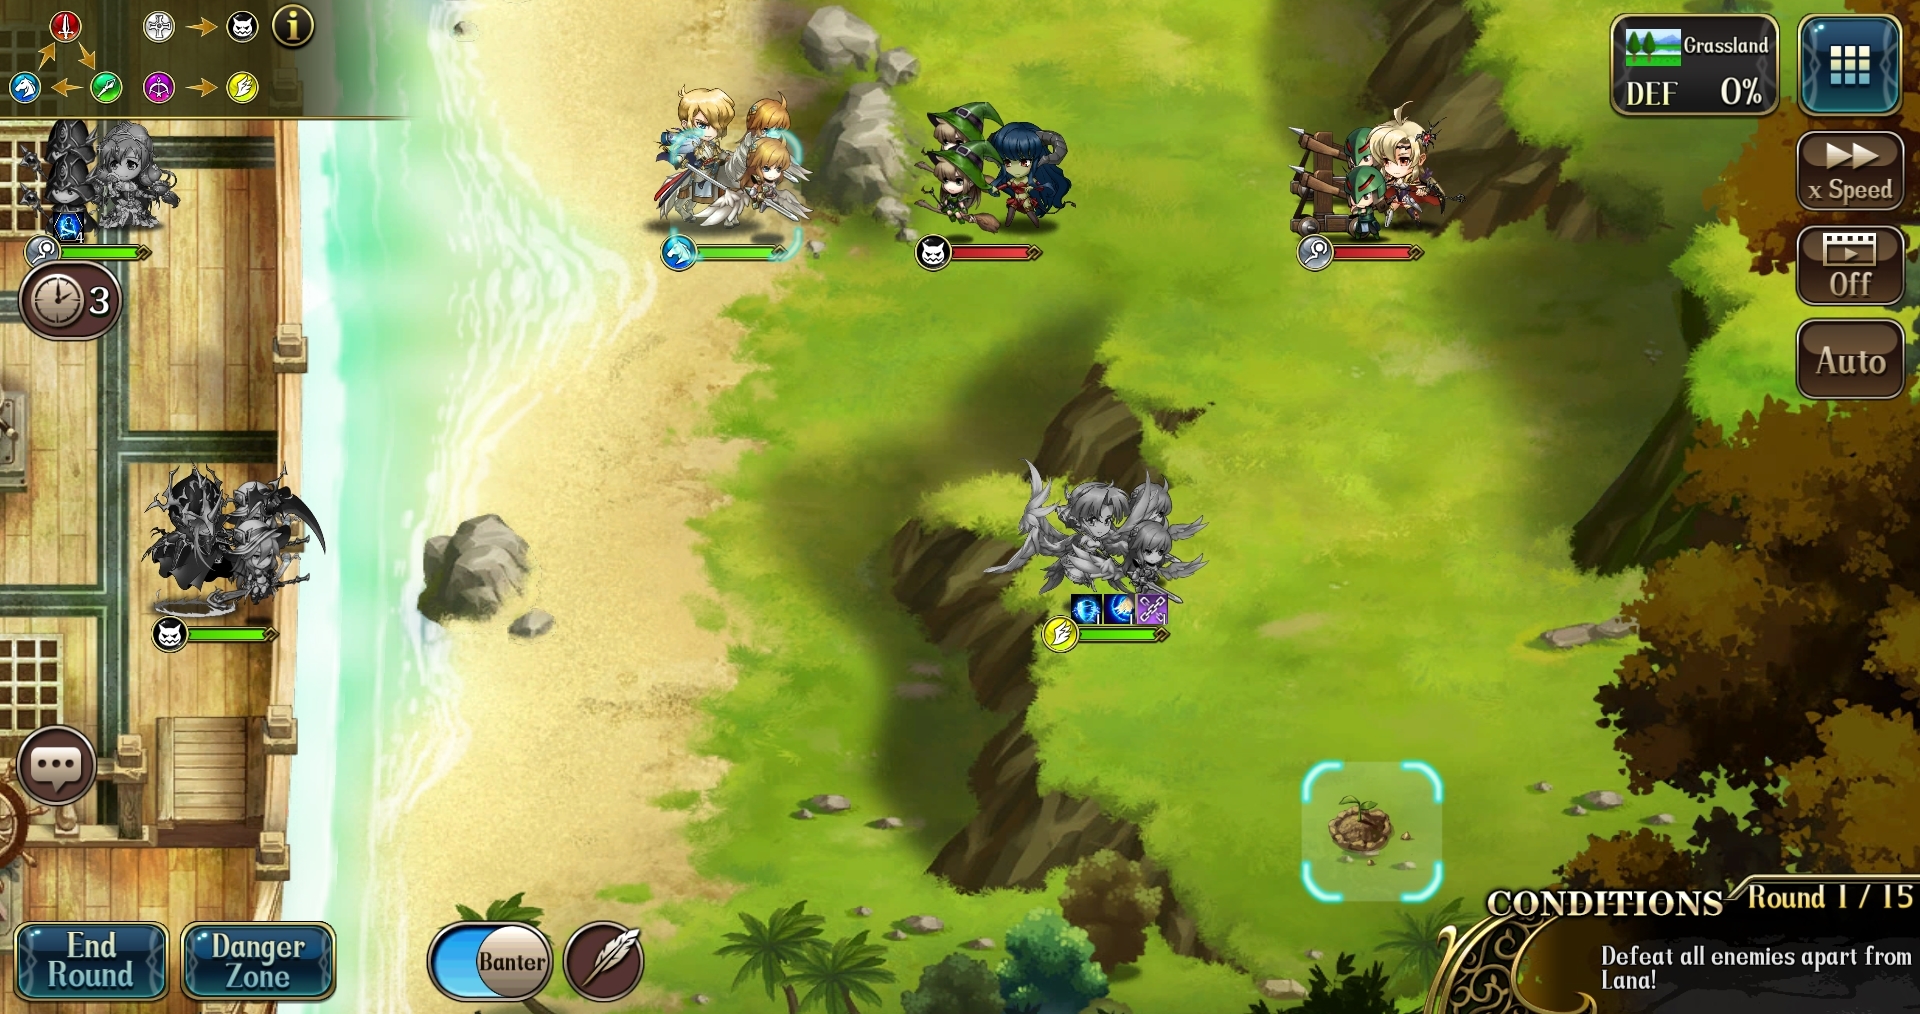
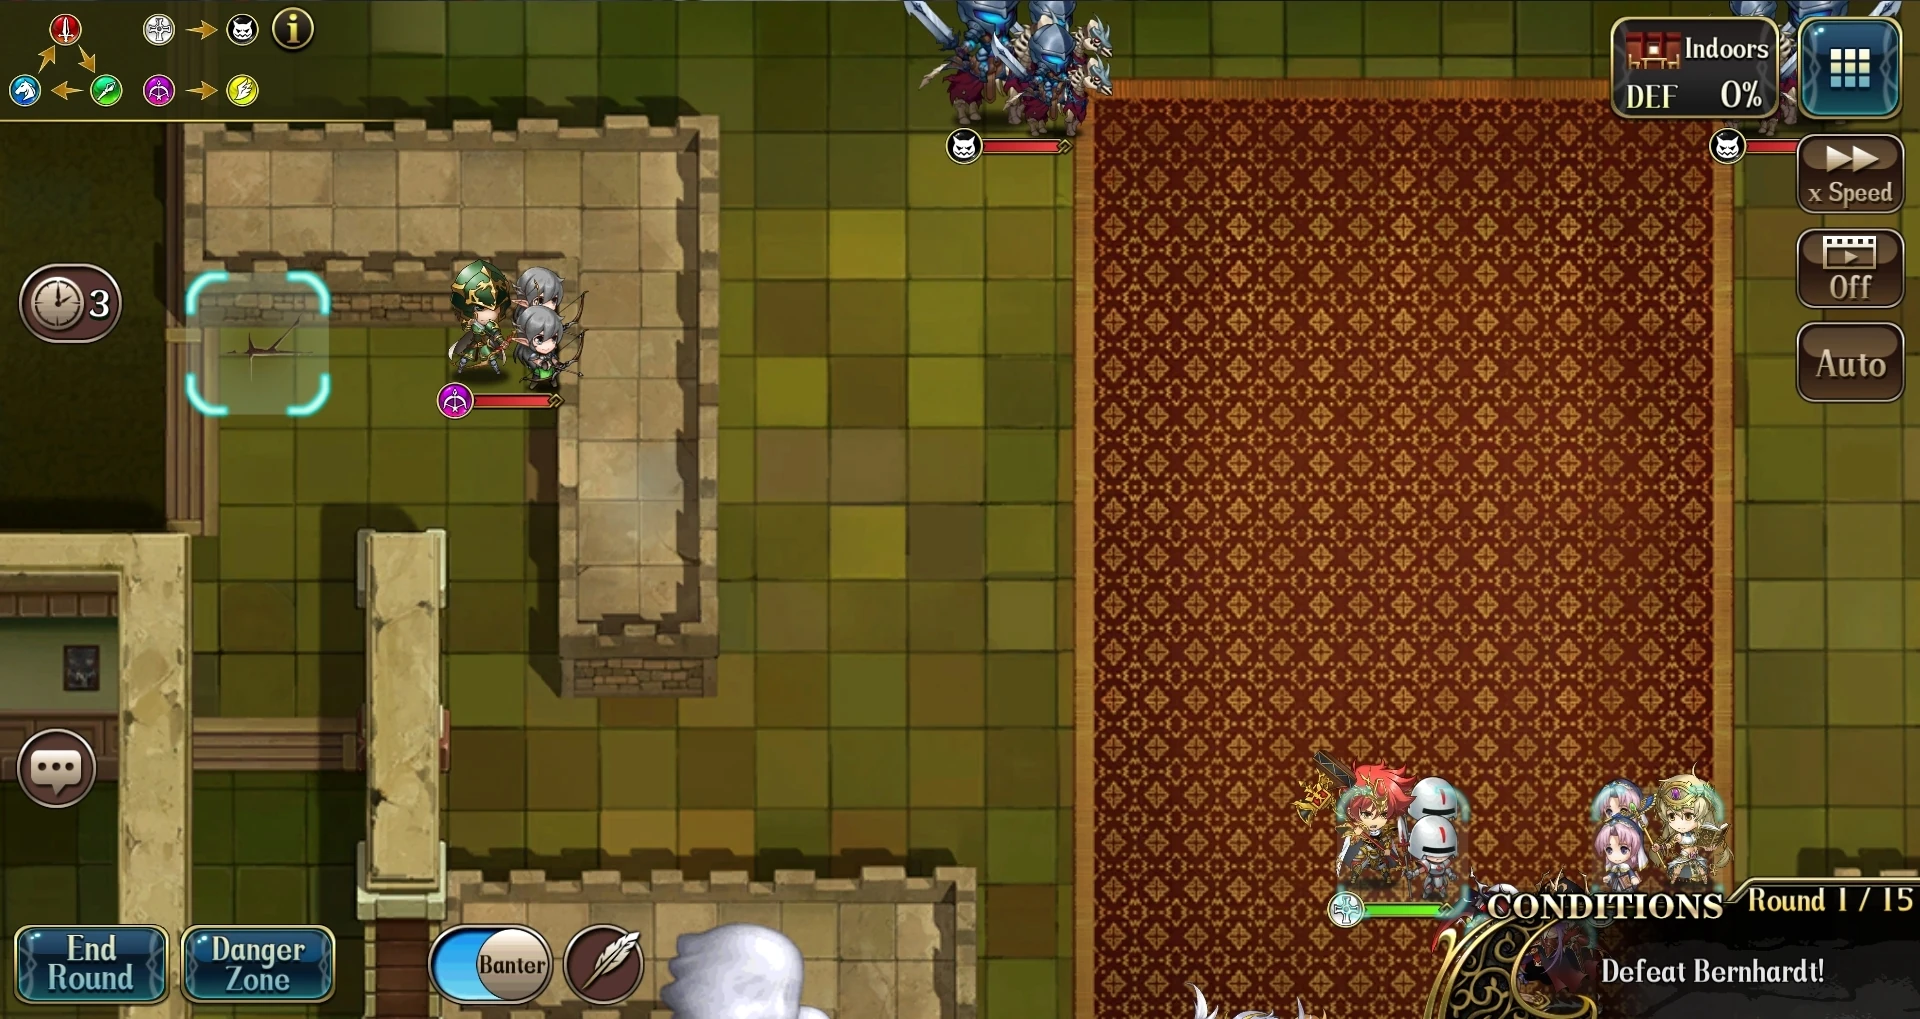
In Langrisser Mobile’s Time Rift mode, you can revisit classic stages from the entire Langrisser series. Test your mettle in the Siege of Kalxath City, the Battle of Baldea River, and over 300 other epic showdowns, including appearances by the Aniki Brothers, a face-off in the Temple of Darkness, and other special stages.
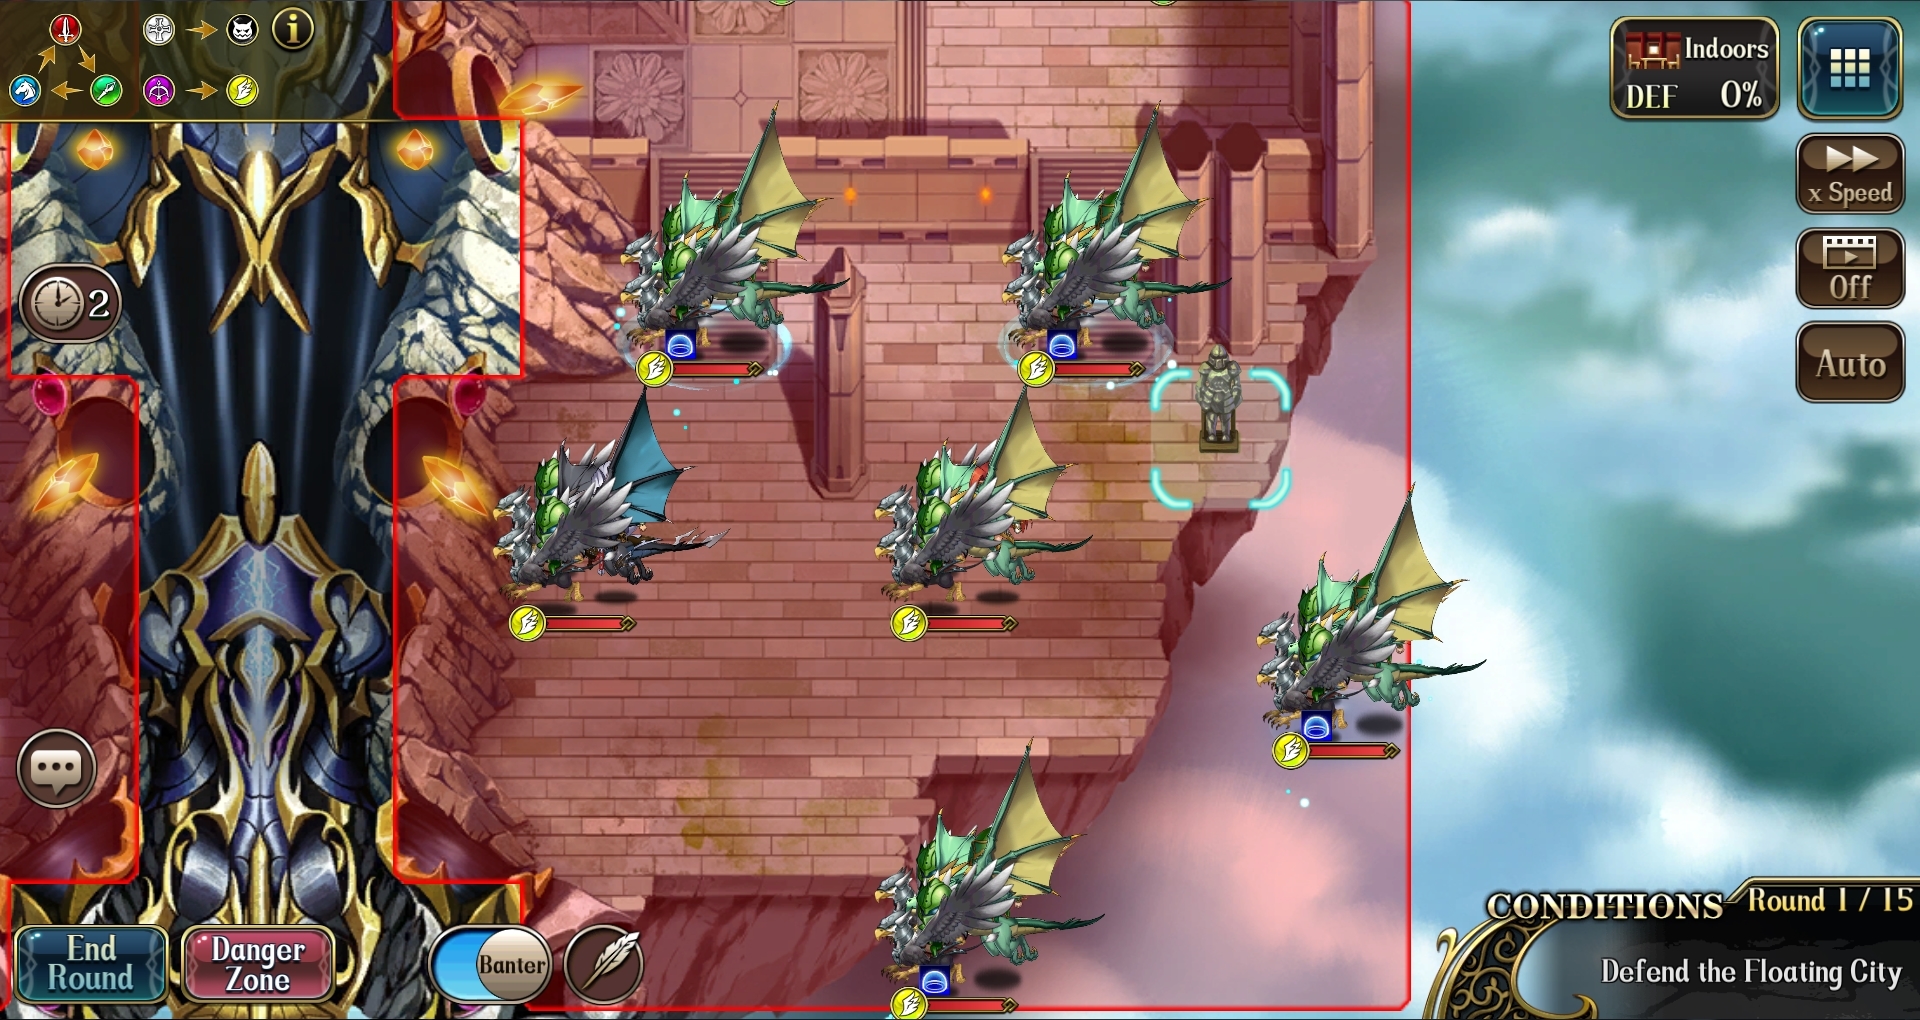
The victory conditions differ from stage to stage: eliminate your enemies, defend allies from defeat, survive overwhelming onslaughts from powerful enemy armies, and carefully use terrain to block the enemy’s advance – the list goes on and on! Each stage presents a fun and unique challenge and puts your tactical mastery to the test!
Time Rift stages grant loads of transfer materials, so if you want to transfer your heroes to a new class, you know where to go, Commander!
Secret Chest Locations:[]
Light: II Prequel[]
Normal[]
1-1 : Cupboard in Top Room (REWARD: 15 Trinity Crystals)
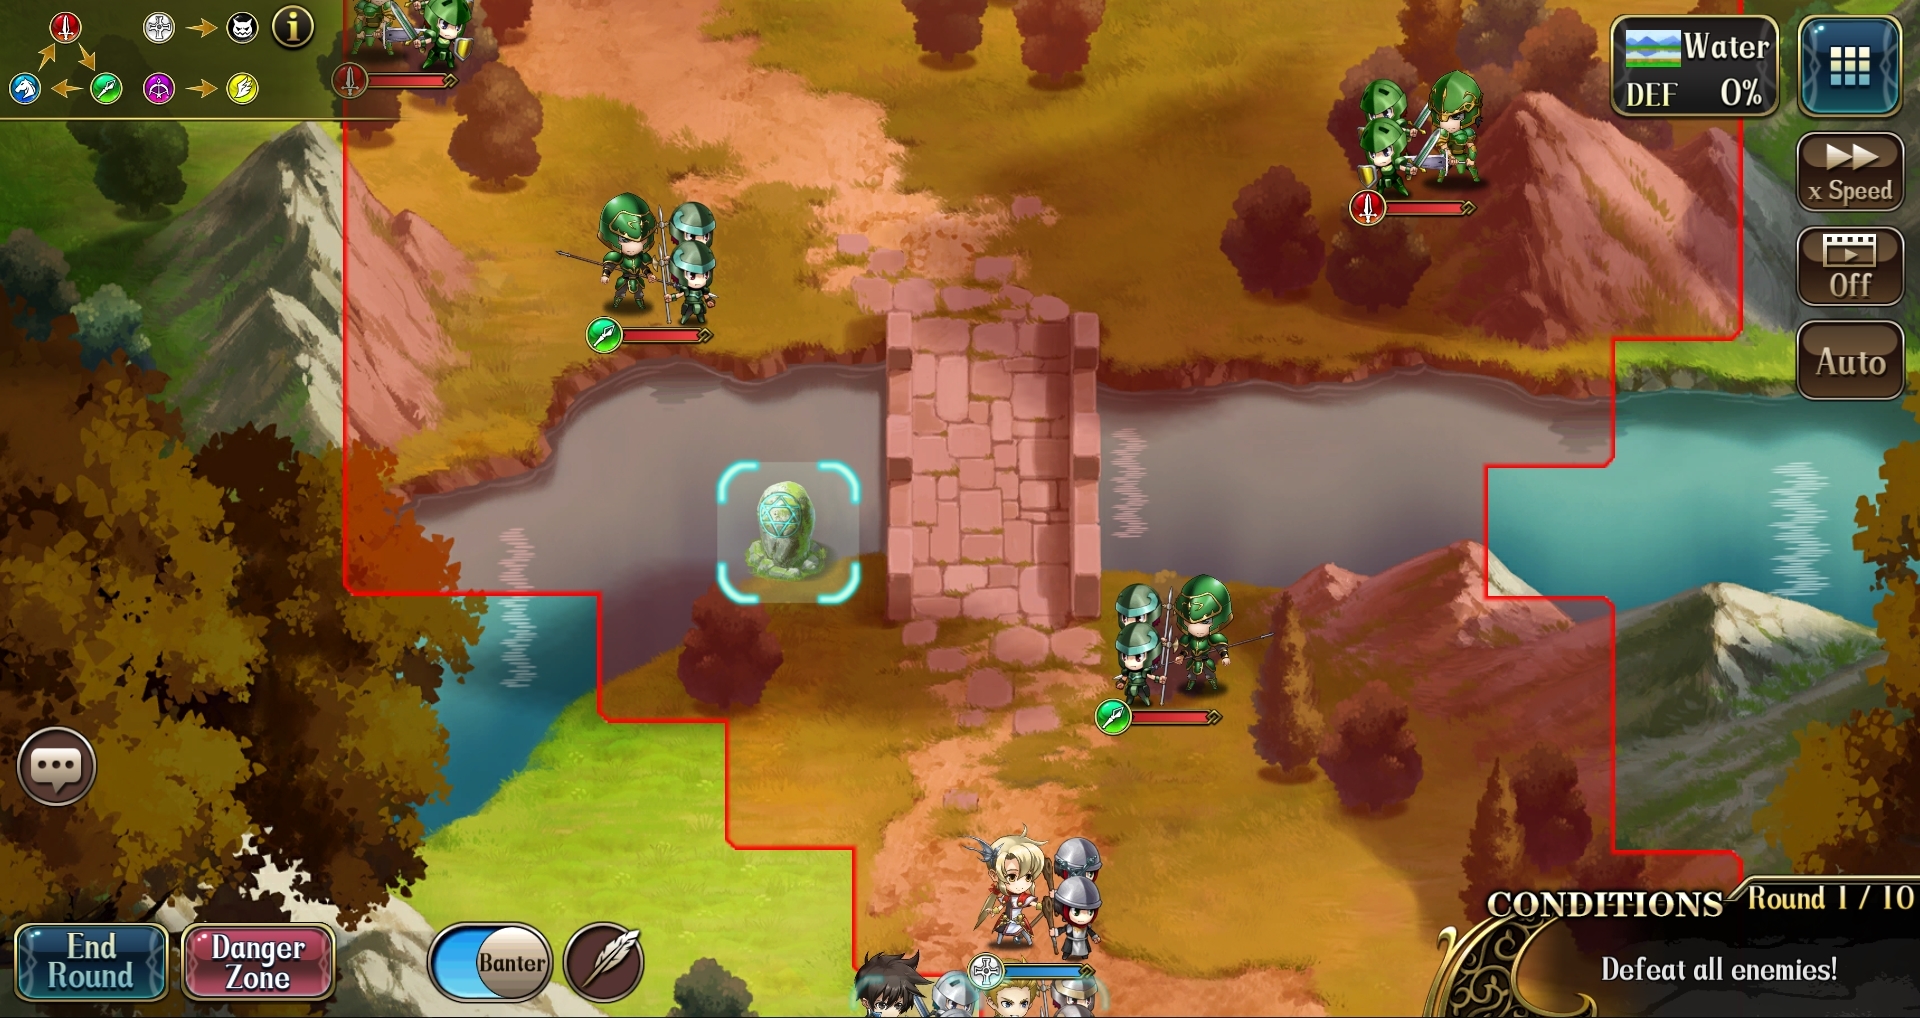
1-2 : The stone with magic array at the bridge (REWARD: SR Speed Boots (HP+20, MDEF+3))
1-3 : Blue torch on right of room (REWARD: 2 Friendship Vouchers)
1-4 : The blue banner on top of the room (REWARD: 1 Trinity Voucher)
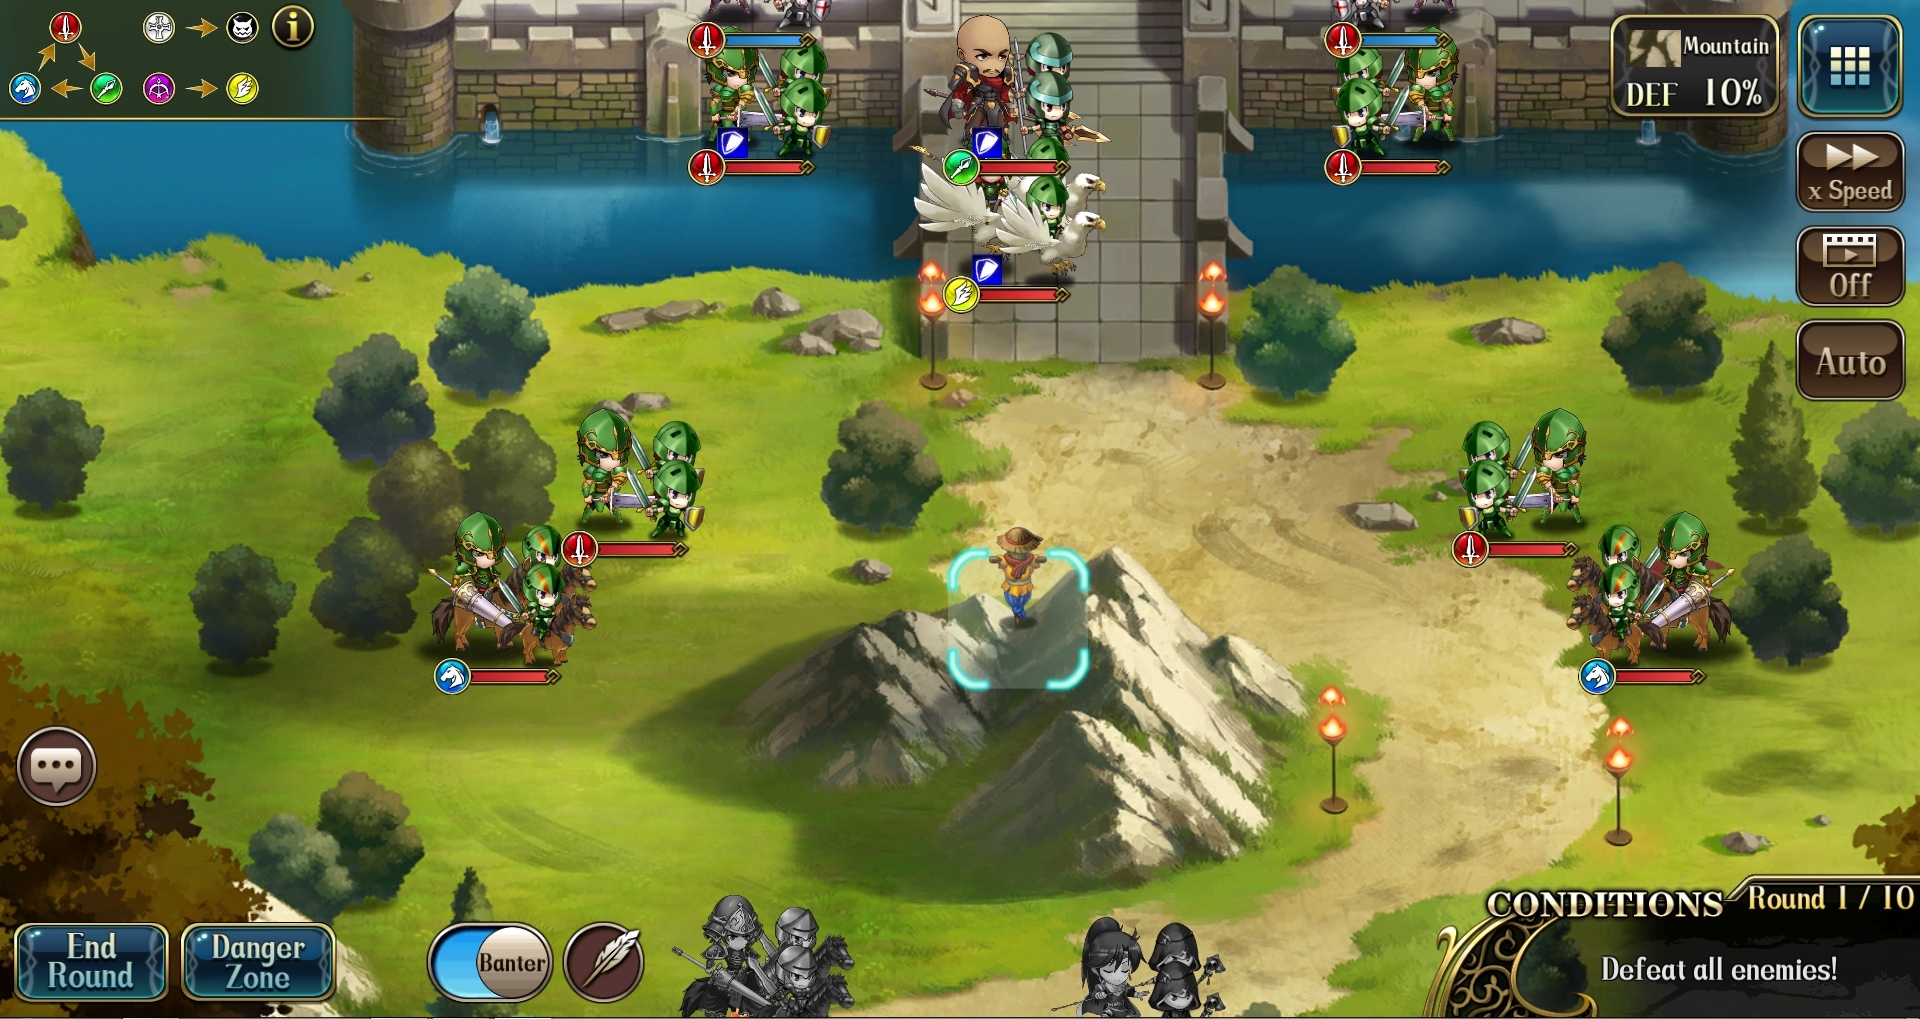
1-5 : A crack in the middle right mountain range (REWARD: 1 Trinity Voucher)
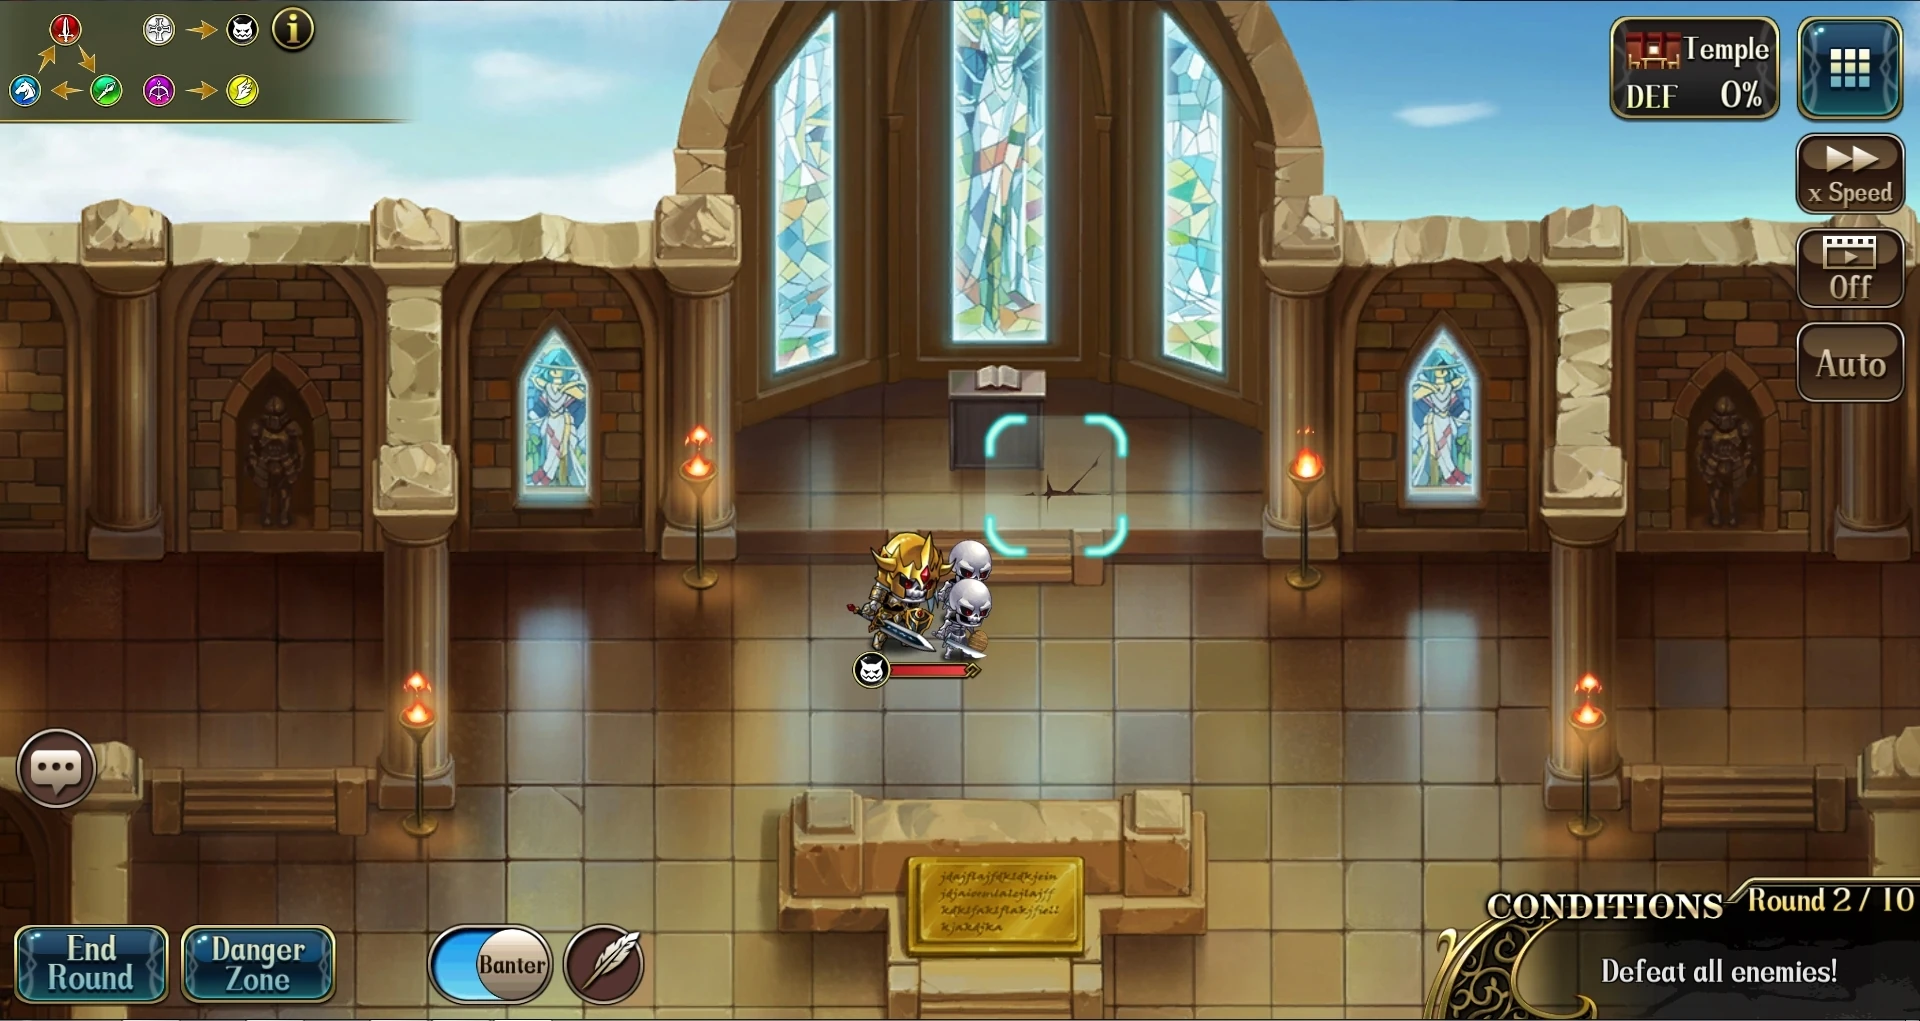
1-6 : A crack in the floor of the altar on top of the map (REWARD: SR Life Staff (HP+17, INT+7))
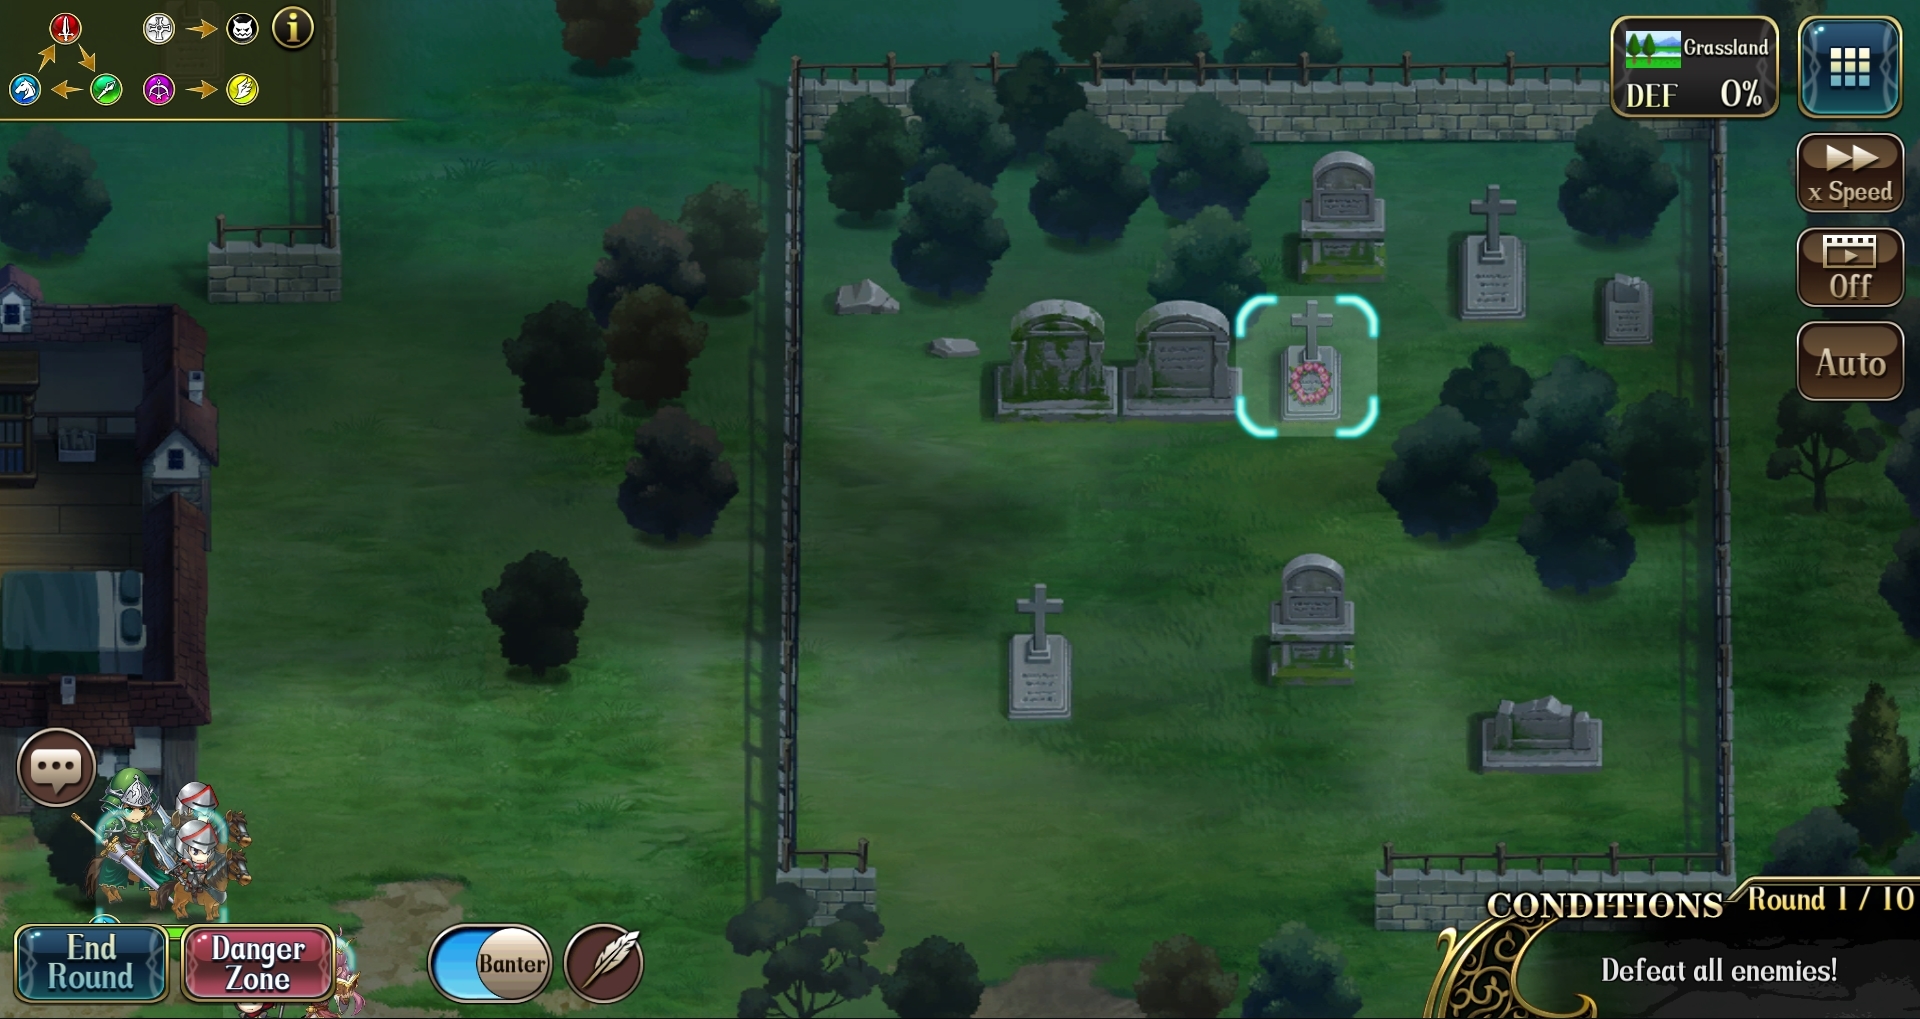
1-7 : Tomb with wreath on north east of map. (REWARD: 25 Trinity Crystals)
Elite[]
1-1 : Rose bush right of the top house. (REWARD: 25 Trinity Crystals)
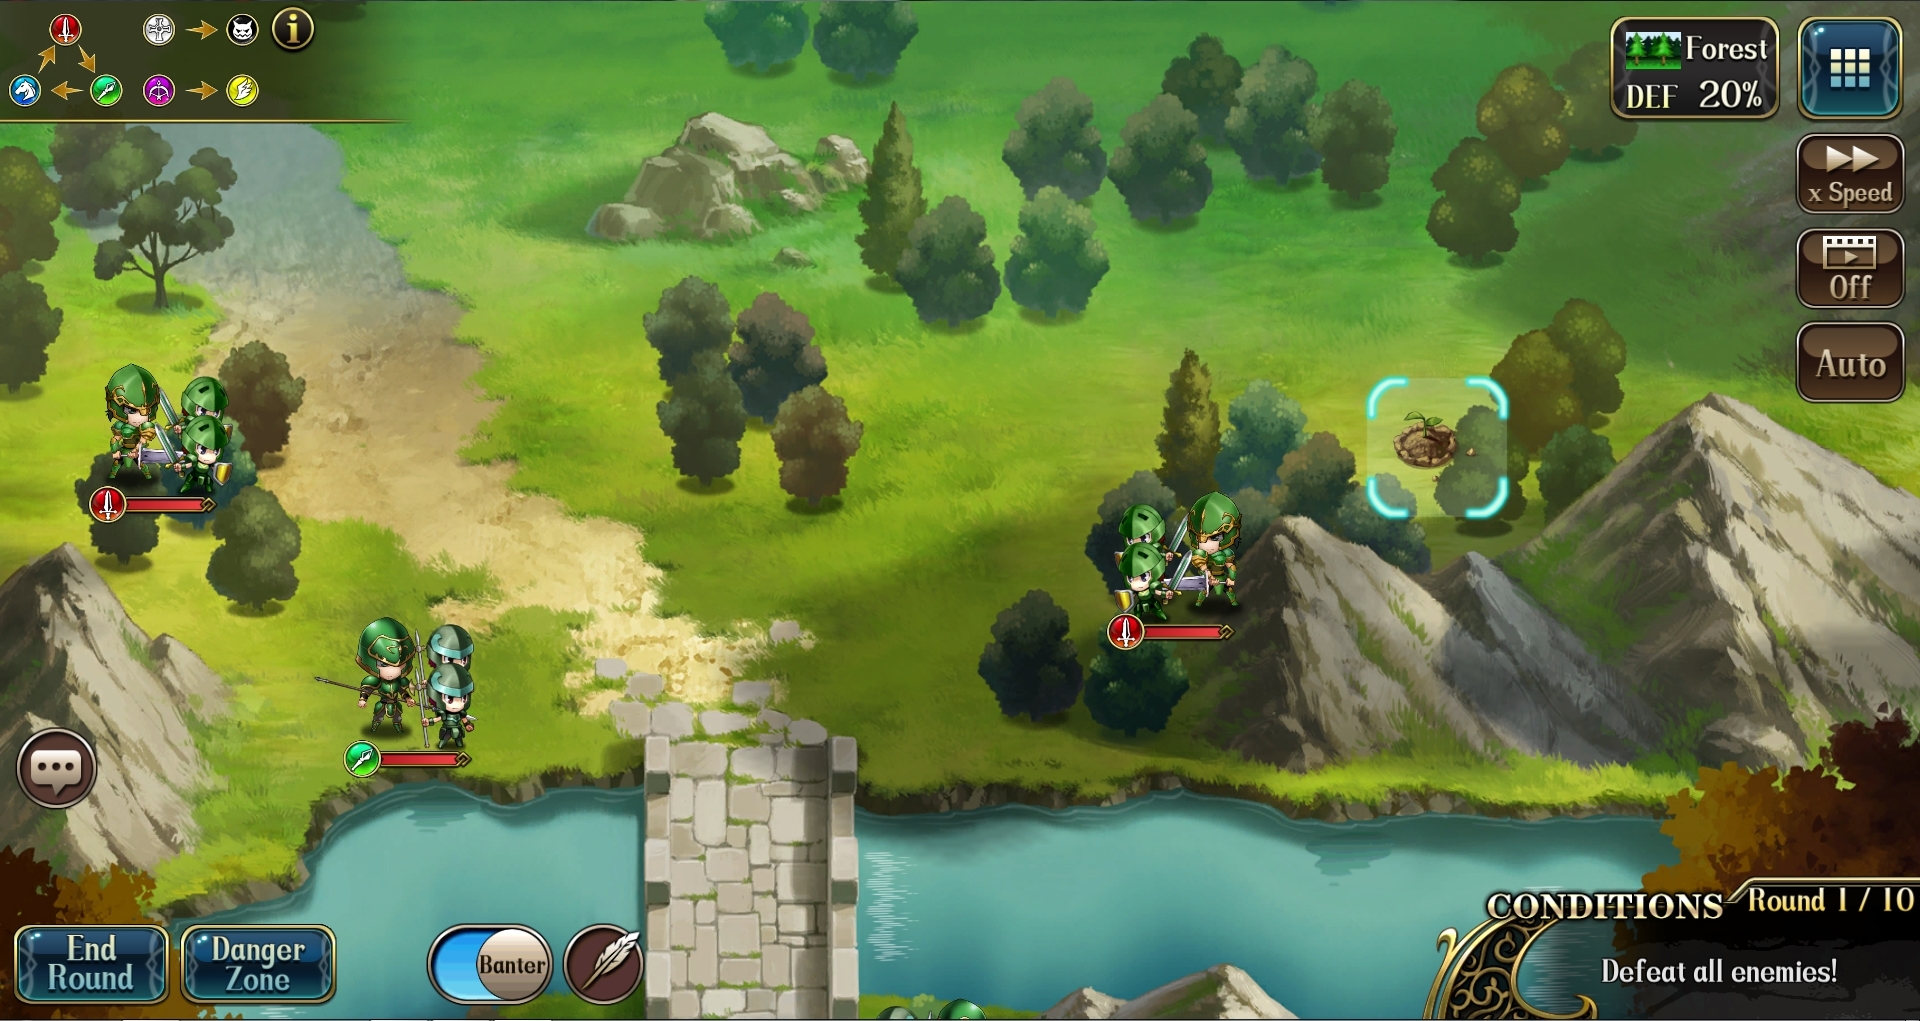
1-2 : Earth lump at the top right of mountain range (REWARD: 1 Trinity Voucher)
1-3 : Cupboard left of where you start (REWARD: 3 Friendship Vouchers)
1-4 : Scarecrow in middle of the mountain range (REWARD: Rare Crafters Hammer - Golden)
1.5 : Fossil on bottom left before you cross the bridge (REWARD: 1 Trinity Voucher)
1.6 : Crack on left staircase (REWARD: 30 Trinity Crystals)
1.7 : Puddle in bottom right of map - south of where Leon spawns (REWARD: Rare Martial Spirit)
Light: II Story[]
Normal[]
2-1 : Bird nest above other side of bridge. (REWARD: 25 Trinity Crystals)
2-2 : Floating green lily pad right of the bridge. (REWARD: SR Swift Helmet (HP+17, MDEF+4))
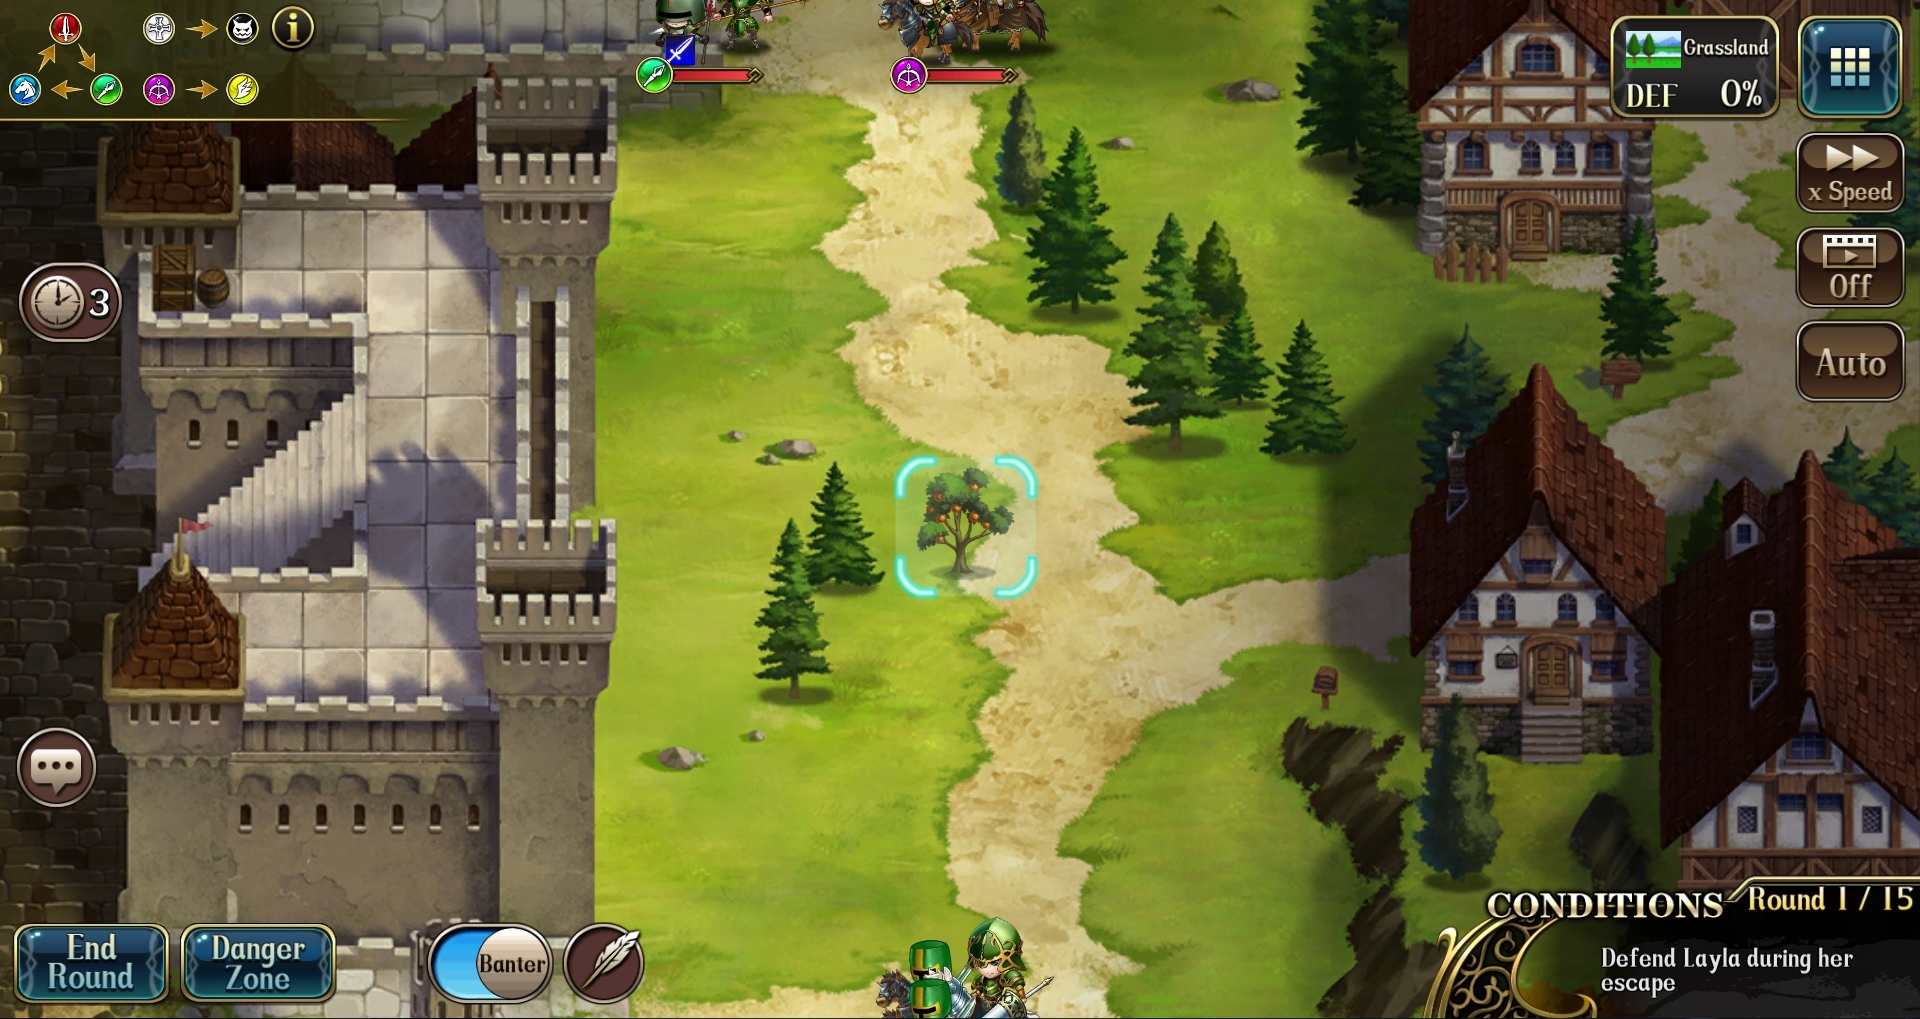
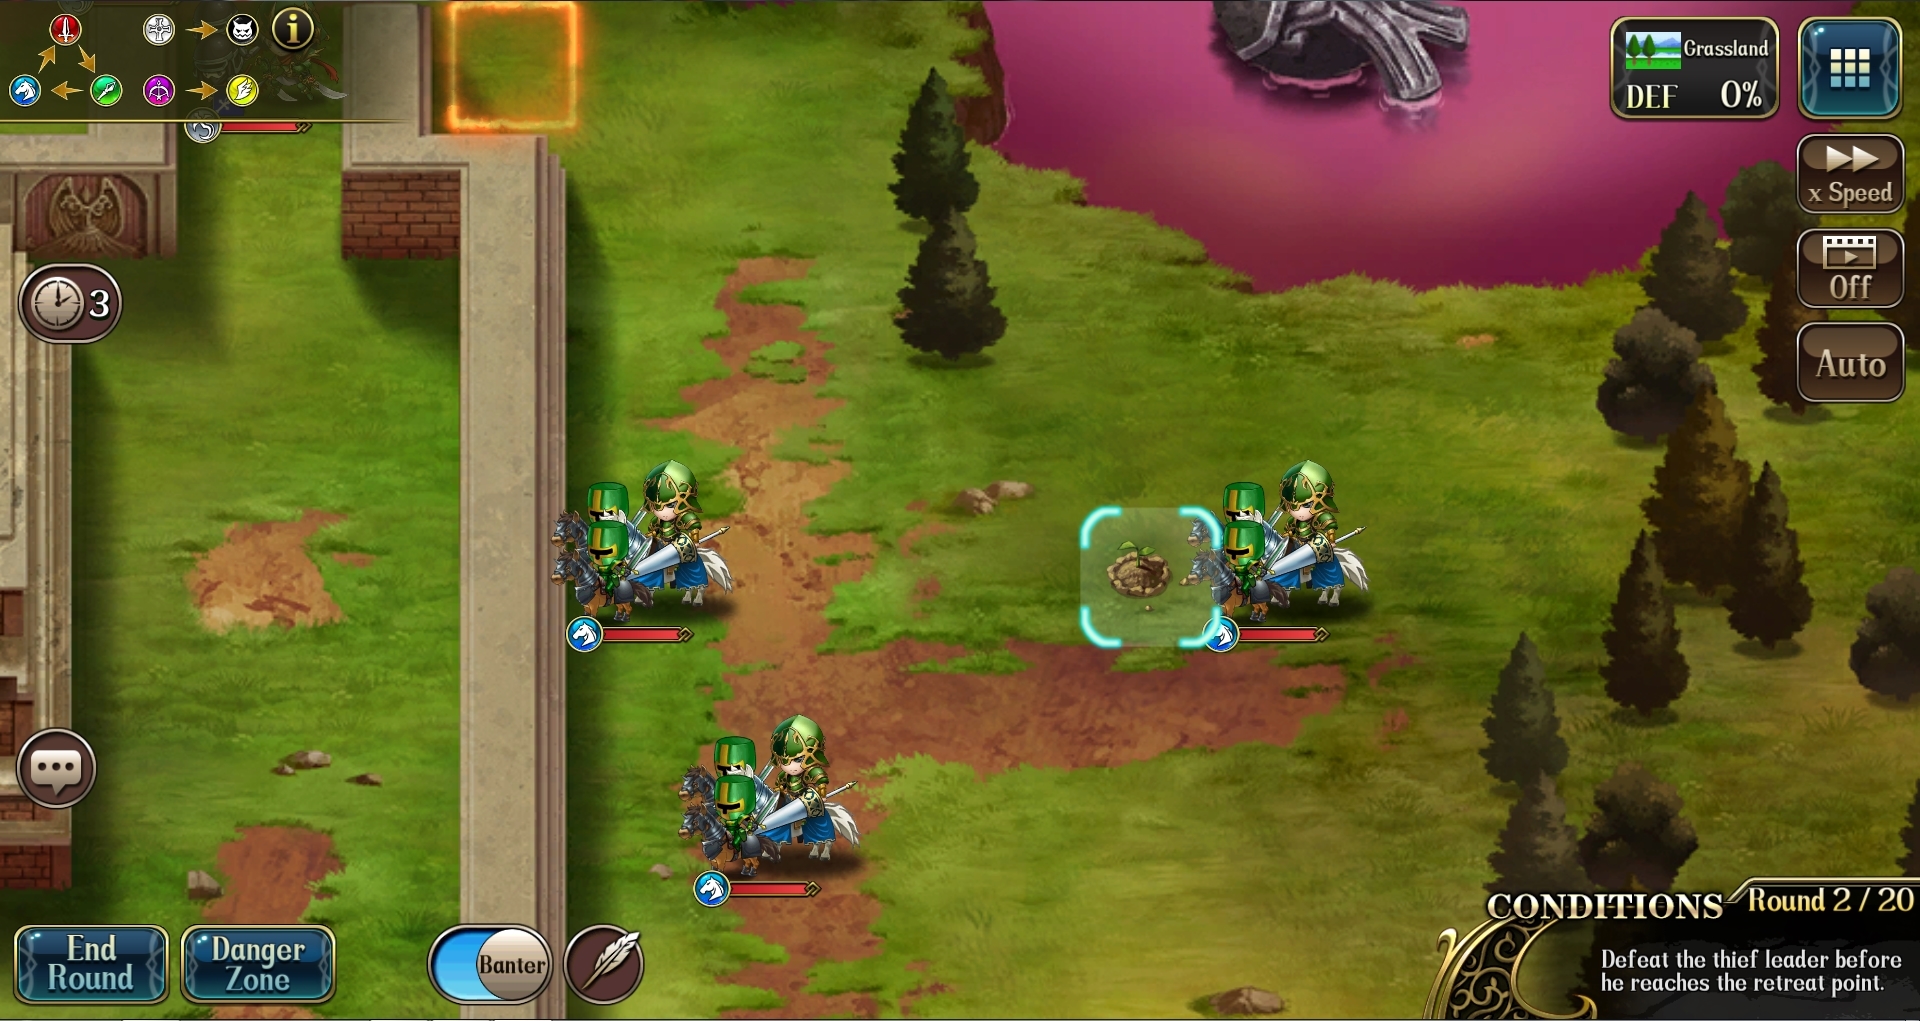
2-3 : Fruit tree right on top of left side of castle (REWARD: Rare Crafters Hammer - Golden)
2-4 : Earth lump in top right corner of castle. (REWARD: SR Greaves (DEF+3, MDEF+3))
2-5 : Green bird box left of mountain above starting position (REWARD: 30 Trinity Crystals)
2-6 : Blue torch in left side of castle (REWARD: 35 Trinity Crystals)
2-7 : Floating barrel on top (REWARD: SR Dragon Scale Armor (HP+17, DEF+5))
Elite[]
2-1 : Bird nest in the bottom right. (REWARD: 35 Trinity Crystals)
2-2 : Barrel floating to the right of castle. (REWARD: 1 Trinity Voucher)
2-3 : Earth mound outside right side of castle (REWARD: Rare Crafter's Hammer - Golden)
2-4 : Crack in the floor - bottom left side of the castle below Laird (REWARD: 35 Trinity Crystals)
2-5 : Blue flag on left side of the castle (REWARD: SR Dragon Scale Armor (HP+17, DEF+5))
2-6 : Blue flame next to Egbert (REWARD: 40 Trinity Crystals)
2-7 : Rose bush on right side of boat (REWARD: 1 Trinity Voucher)
Light: II Epilogue[]
Normal[]
3-1 : Barrel floating in top right. (REWARD: 35 Trinity Crystals)
3-2 : Earth mound to right of top ghost. (REWARD: 1 Trinity Voucher)
3-3 : Crack in floor in far left side of the castle (REWARD: Rare Crafter's Hammer - Golden)
3-4 : Statue far right side of castle next to the flame (REWARD: SR Feathered Light Armor (HP+20, DEF+4))
3-5 : Birdhouse in the top left on the cliff (REWARD: 40 Trinity Crystals)
3-6 : Scarecrow in the upper right corner of map (REWARD: 1 Trinity Voucher)
3-7 : Blue flame above the right side vampire (REWARD: Rare Crafter's Hammer - Golden)
Elite[]
3-1 : Blue flag at the top of the right ship (REWARD: 2 Rare Crafter's Hammers - Golden)
3-2 : Earth mound near bottom right corner of the map (REWARD: 45 Trinity Crystals)
3-3 : Skeleton on right path near Egbert (REWARD: SR Ghost Robe (HP+22, DEF+3))
3-4 : Blue flame in bottom left corner of castle (REWARD: 45 Trinity Crystals)
3-5 : Barrel in south part of river (REWARD: 1 Trinity Voucher)
3-6 : Cupboard in the upper left part of the castle (REWARD: 2 Rare Crafter's Hammers - Golden)
3-7 : Crack in floor on left side of map - inside the upside down L-shaped wall (REWARD: 45 Trinity Crystals)
Empire: II Prequel[]
Normal[]
4-1 : Rock at bottom right corner of the map (REWARD: 1 Trinity Voucher)
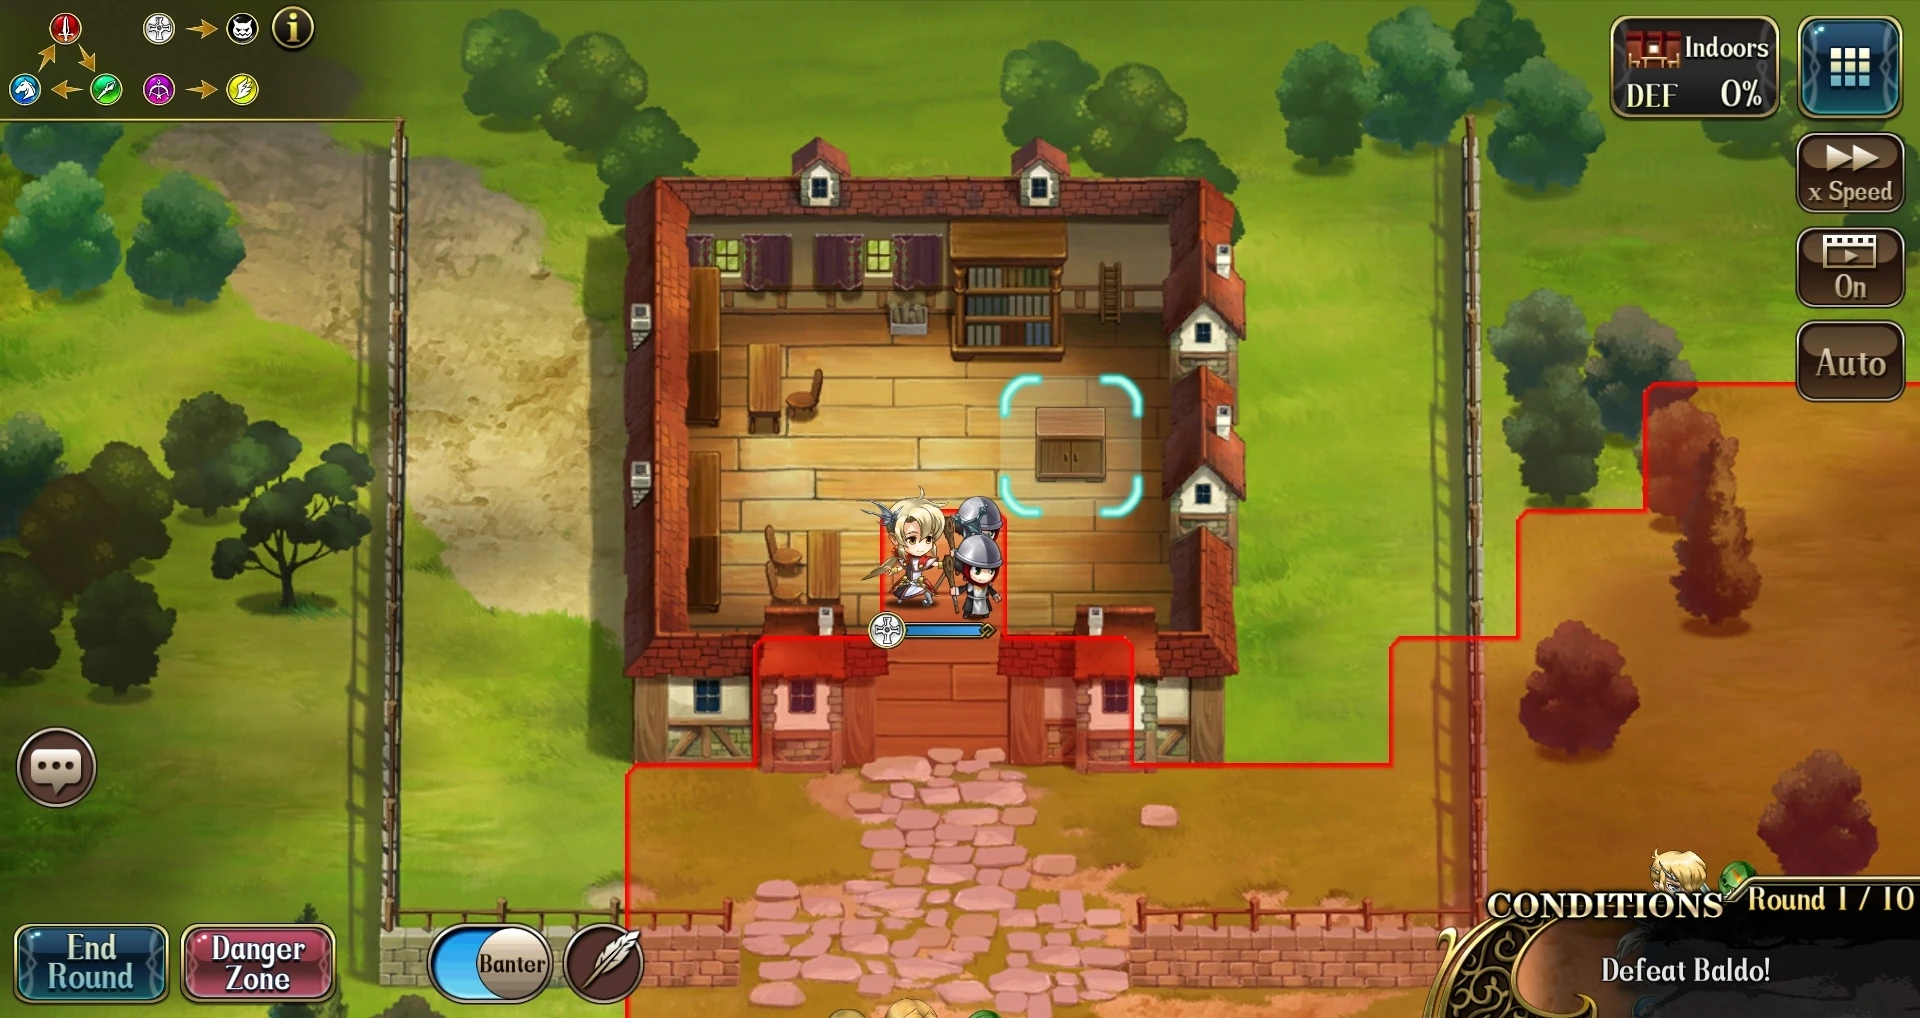
4-2 : Chest inside house (REWARD: SR Ghost Mask (HP+14, MDEF+5))
4-3 : Green bird box in upper right corner of the map (REWARD: 45 Trinity Crystals)
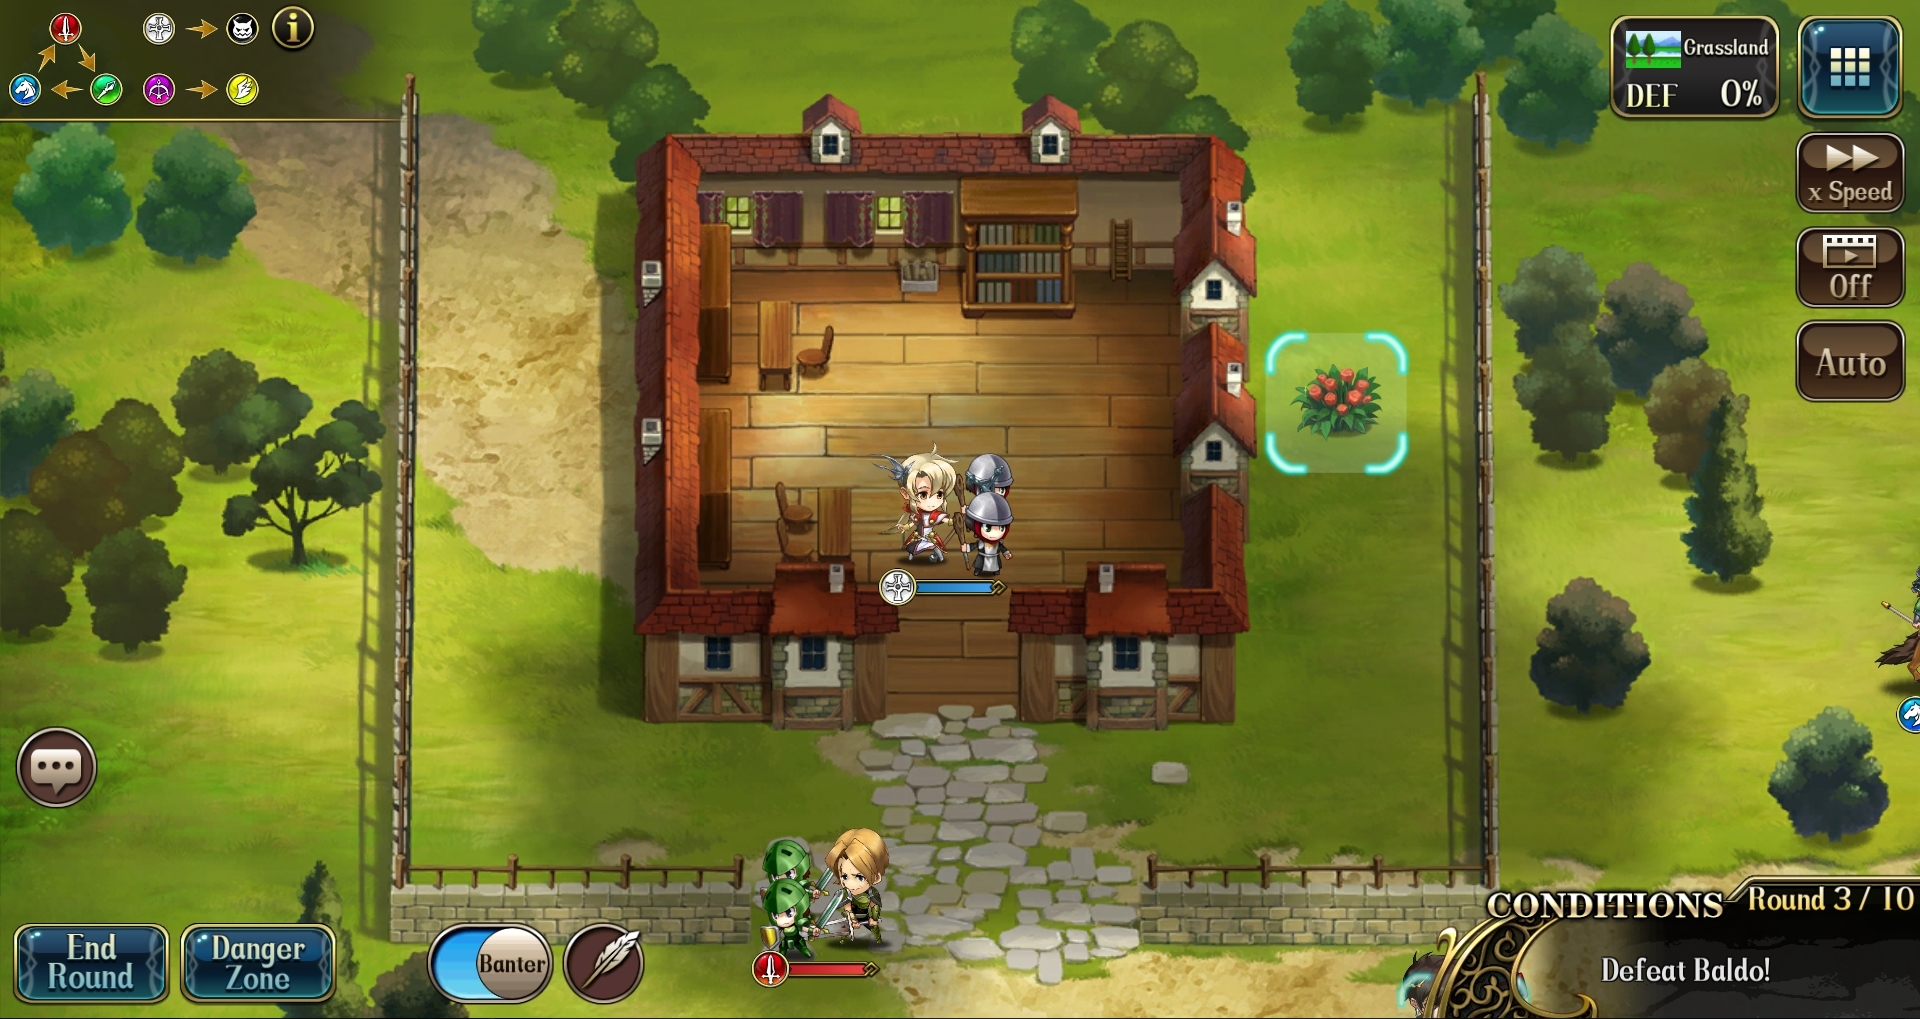
4-4 : Rosebush in bottom right corner of the map (REWARD: 2 Trinity Vouchers)
4-5 : Scarecrow in bottom left corner (REWARD: 50 Trinity Crystals)
4-6 : Scarecrow north of castle (REWARD: 2 Trinity Vouchers)
4-7 : Lily pad to the right of the castle (REWARD: SR Mithril Armor (HP+17, DEF+5))
Elite[]
4-1 : Tree right above Lester on right side of map (REWARD: SR Elven Bow (ATK+7, SKL+3))
4-2 : Birdhouse below house (REWARD: 45 Trinity Crystals)
4-3 : Scarecrow near top left corner of map (REWARD: 1 Trinity Voucher)
4-4 : Suit of armor on right side of castle (REWARD: 2 Rare Crafter's Hammers - Golden)
4-5 : Grave in middle of the map (REWARD: 50 Trinity Crystals)
4-6 : Blue flag on left castle wall (REWARD: SR Scryer (HP+20, DEF+3))
4-7 : Magic stone on left side of map (REWARD: 50 Trinity Crystals)
Empire: II Epilogue[]
Normal[]
5-1 : Rosebush in top right corner of the map (REWARD: 50 Trinity Crystals)
5-2 : Magic stone on right side of the map (REWARD: 1 Trinity Voucher)
5-3 : Sparkling puddle near bottom right corner of the map (REWARD: Rare Crafter's Hammer - Golden)
5-4 : Blue flag on bottom left side of map (REWARD: SR Crystal Anklet (DEF+3, INT+5))
5-5 : Bones on northwest corner of cargo in the north-west part of the map (REWARD: 60 Trinity Crystals)
5-6 : Barrel in the middle of the lake (REWARD: 2 Trinity Vouchers)
5-7 : Magic stone at right side of the throne room (REWARD: 2 Rare Crafter's Hammers - Golden)
Elite[]
5-1 : Blue flag on right side of the castle (REWARD: 1 Trinity Voucher)
5-2 : Suit of armor at left side of the castle (REWARD: 3 Rare Crafter's Hammers - Golden)
5-3 : Fruit tree next to the right mountain range (REWARD: 60 Trinity Crystals)
5-4 : A crack on the ground by the stairs on the very left (REWARD: SR Feathered Hat (HP+17, MDEF+4))
5-5 : Birdhouse on the left side of the map (REWARD: 60 Trinity Crystals)
5-6 : Pile of bones in the water near the left side of the castle (REWARD: 1 Trinity Voucher)
5-7 : Crack in red floor near bottom right side of the map (REWARD: Epic Crafter's Hammer - Crystal)
Langrisser: I Prequel[]
Normal[]
6-1 : Suit of armor at bottom left part of castle (REWARD: 2 Trinity Vouchers)
6-2 : Lily pad to the left of the bridge (REWARD: 60 Trinity Crystals)
6-3 : Barrel in south part of river (REWARD: 2 Rare Crafter's Hammers - Golden)
6-4 : Earth mound at top left corner of the map (REWARD: SR Rune Axe (HP+17, ATK+8))
6-5 : Crack in the middle of the mountain range at the center of the map (REWARD: 2 Rare Crafter's Hammers - Golden)
6-6 : Blue flame at the south end of the castle (REWARD: SR Assault Ring (ATK+5, DEF+3))
Elite[]
6-1 : Barrel floating in the southeast part of the moat (REWARD: 70 Trinity Crystals)
6-2 : Fruit tree in the top left corner of the map (REWARD: SR Sentinel Emblem (ATK+5, DEF+3))
6-3 : Scarecrow near the top right corner of the map (REWARD: 70 Trinity Crystals)
6-4 : Dirt pile on the north side of the map (REWARD: 1 Trinity Voucher)
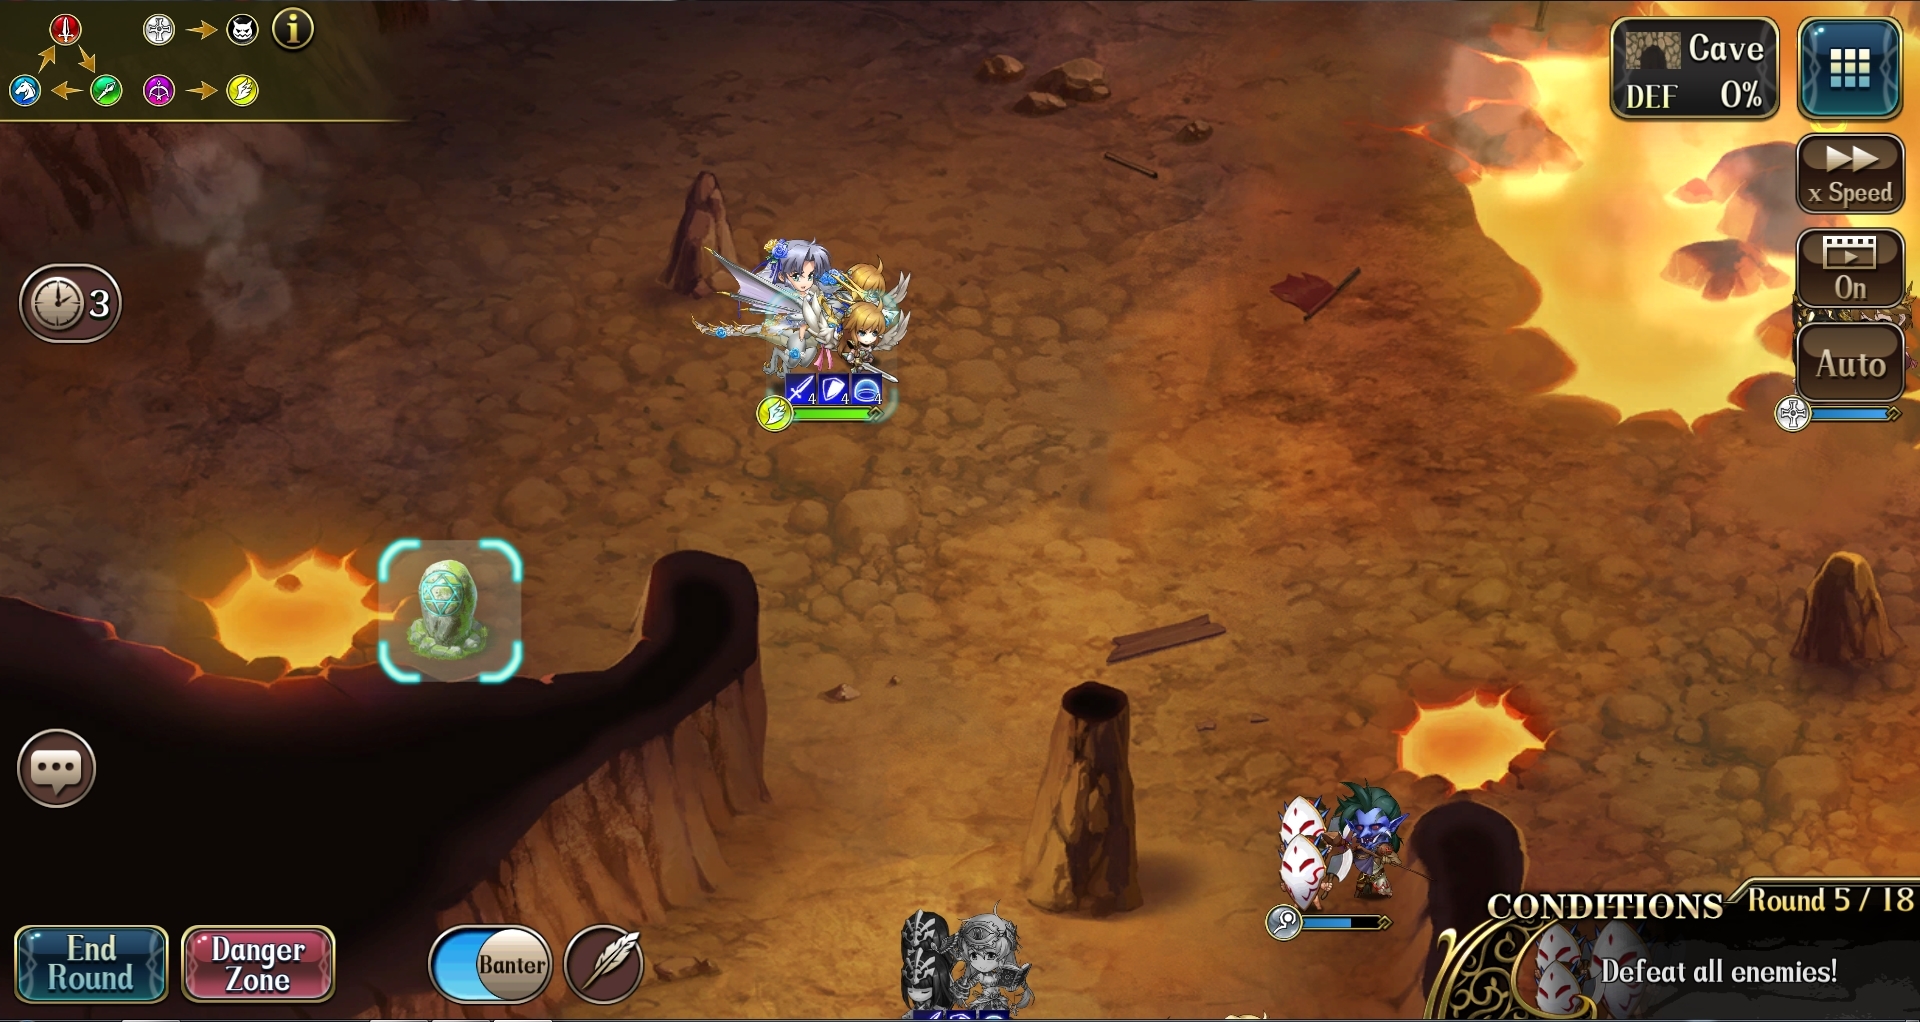
6-5 : Magic stone to the right of Ledin (REWARD: Epic Crafter's Hammer - Crystal)
6-6 : Blue flag on northeastern wall of the castle (REWARD: 80 Trinity Crystals)
Langrisser: I Story[]
Normal[]
7-1 : Bones on the island on the right side of the map (REWARD: 60 Trinity Crystals)
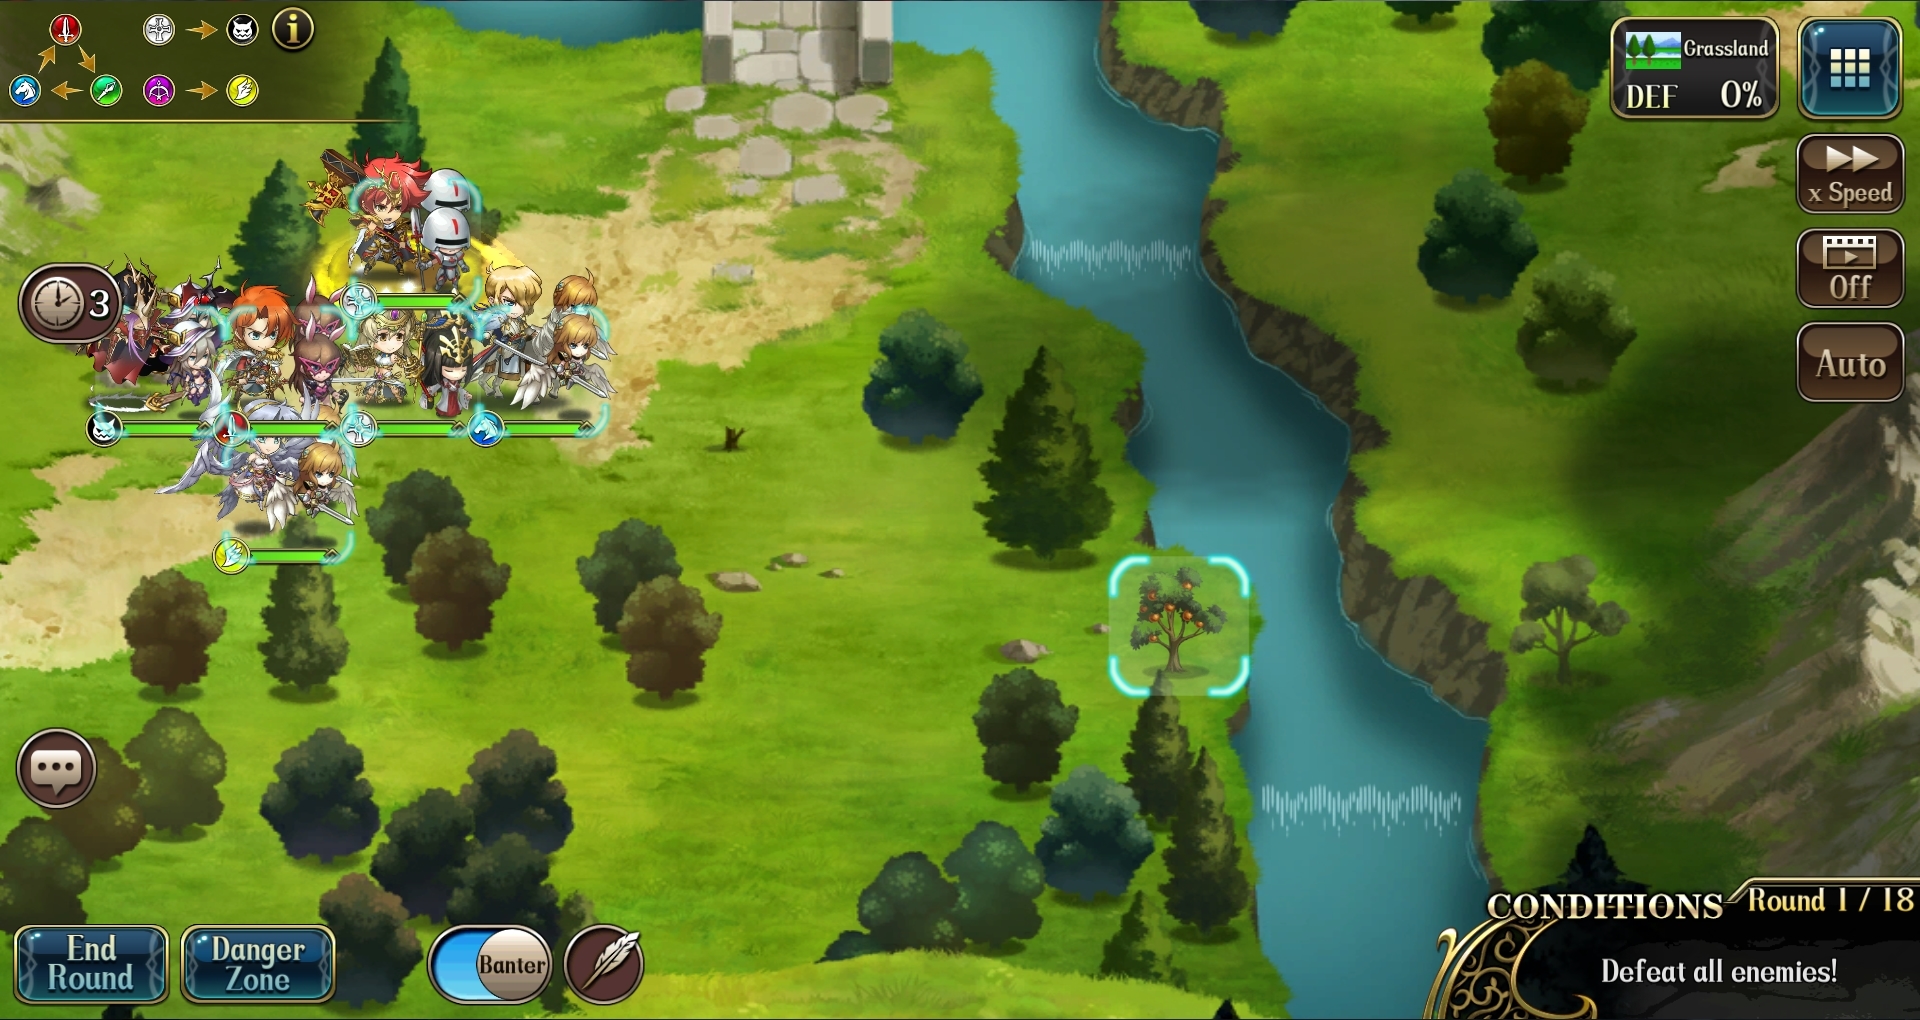
7-2 : Fruit tree on the left side of the mountain range (REWARD: 2 Trinity Vouchers)
7-3 : Lily pad on the right side of the map (REWARD: Epic Crafter's Hammer - Crystal)
7-4 : Barrel floating north of the castle (REWARD: 60 Trinity Crystals)
7-5 : Blue flag on peninsula at the southern end of the water (REWARD: 50000 Gold)
7-6 : Blue flame at the bottom right of the castle (REWARD: Epic Crafter's Hammer - Crystal)
7-7 : Blue sparkly puddle in bottom left corner of town (REWARD: 100 Orichalcum Ore)
Elite[]
7-1 : Suit of armor to the right of Albert (REWARD: 80000 Gold)
7-2 : Earth mound in the top right corner of the map (REWARD: 2 Trinity Vouchers)
7-3 : Green bird house in the top left corner of the map (REWARD: 80 Trinity Crystals)
7-4 : Piles of bones in the water at the top left corner of the map (REWARD: SSR Twilight Armor (HP+29, DEF+5))
7-5 : Blue torch at the very top right corner of the castle (REWARD: 80 Trinity Crystals)
7-6 : Crack in the floor of the right side of the throne room (REWARD: 100 Orichalcum Ore)
7-7 : Tombstone on the northeast house (REWARD: 2 Epic crafter's Hammers)
Langrisser: I Epilogue[]
Normal[]
8-1 : Blue flame in the top left corner of the village. (REWARD: 2 Trinity Vouchers)
8-2 : In the well below the southern-most ally unit. (REWARD: SSR Aeneas' Helm (HP+34, MDEF+4))
8-3 : Light coming from a hole in the ground on the southeast corner of the map. (REWARD: 70 Trinity Crystals)
8-4 : Drawer at the top left building next to Bozel. (REWARD: 1 Epic Crafting Hammer)
8-5 : Map on the ground of the left side of the castle. (REWARD: 70000 Gold)
8-6 : Symbol on the ground near the top of the map right behind Nikellis. (REWARD: 2 Trinity Vouchers)
8-7 : Crack on the floor in the top right room, with a vampire. (REWARD: 70 Trinity Crystals)
Elite[]
8-1 : Lily pad in the lake at the top right of the map. (REWARD: 2 Trinity Vouchers)
8-2 : Crack in the mountains below Nagya. (REWARD: 80 Trinity Crystals)
8-3 : Skeletal remains in the top-left cavern part. (REWARD: 3 Epic Crafter's Hammers)
8-4 : Wooden Barricade in the top right building. (REWARD: 90000 Gold)
8-5 : Blue flag at bottom right corner of the castle. (REWARD: Epic Martial Spirit)
8-6 : Crack in the floor on the bottom right corner of the map. (REWARD: 2 Trinity Vouchers)
8-7 : Giant standard in the center room with the 2 Vampires. (REWARD: 80 Trinity Crystals)
Langrisser III: Prequel[]
Normal[]
9-1 : Crack in the lower middle right side of the crystal with 4 green markers. (REWARD: Epic Crafter's Hammer)
9-2 : Flowers on the left side of the map. (REWARD: 70000 Gold)
9-3 : Lily pad in the river on the left of the bridge. (REWARD: 150 Orichalcum Ore)
9-4 : Earth lump on the left of the map, under cavalry general. (REWARD: SSR Dark Crown)
9-5 : Lily pad in the river next to the infantry on the right side of the map. (REWARD: 70 Trinity Crystals)
9-6 : Bones to the South of Dieharte's starting location. (REWARD: 80,000 Gold)
9-7 : Barrel floating on the north side of town. (REWARD: 2 Epic Crafter's Hammer - Crystal)
9-8 : Lily pad in the river near the center of the map. (REWARD: 2 Trinity Vouchers)
9-9 : Symbol on the ground near the top right side of the map right behind Kashinton. (REWARD: 70 Trinity Crystals)
Elite[]
9-1 : Statue on the right side of the map, below the stairs. (REWARD: 90,000 gold)
9-2 : Fruit tree on the right side of the map, between the two groups of enemies. (REWARD: 3 Epic Crafter's Hammer)
9-3 : Tombstone with pink circle in the top left corner. (REWARD: 150 Orichalcum Ore)
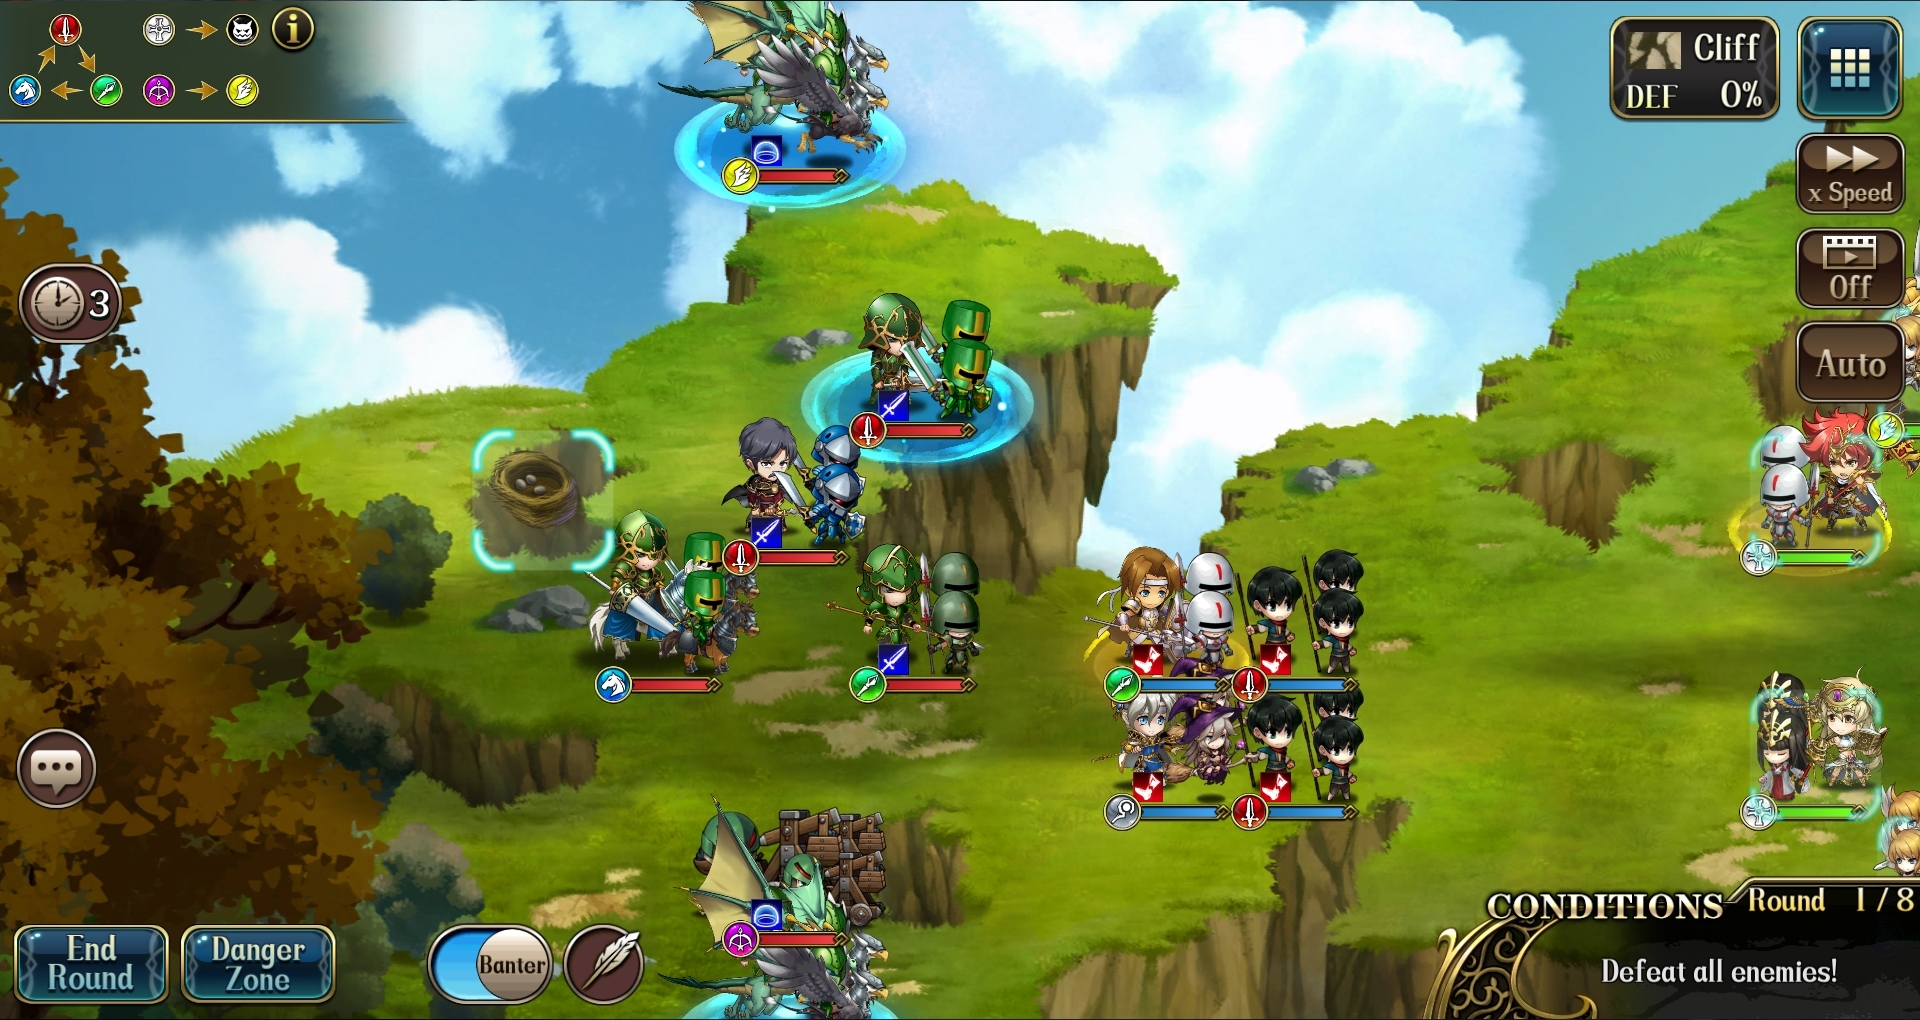
9-4 : Bird nest on the left side of the map, left of Grier. (REWARD: 80 Trinity Crystals)
9-5 : Scarecrow left side of Emerick troops at the south of the map in the forest area. (REWARD: 90,000 Gold)
9-6 : Fruit tree on the left side of the map, south of the first Lancer ally. (REWARD: 3 Epic Crafter's Hammer)
9-7 : Suit of armor, southeast corner of the map between a Cavalry and a Flier General. (REWARD: Epic Martial Spirit)
9-8 : Earth lump between the two statues south of Do Kahni. (REWARD: 80 Trinity Crystals)
9-9 : Fruit tree on the northwest corner of the map. (REWARD: 2 Trinity Vouchers)
Langrisser III: Story[]
Normal[]
10-1 : Piles of bones on the right side of the middle wall on top of the small lava pool (REWARD: 2 Epic Crafter's Hammer)
10-2 : Barrel floating on the river northwest corner of the map (REWARD: 80 Trinity Crystals)
10-3 : Star Symbol Rock on the bottom right side of the map (REWARD: 2 Trinity Vouchers )
10-4 : Chest in the bottom left room (REWARD: 150 Orichalcum Ore)
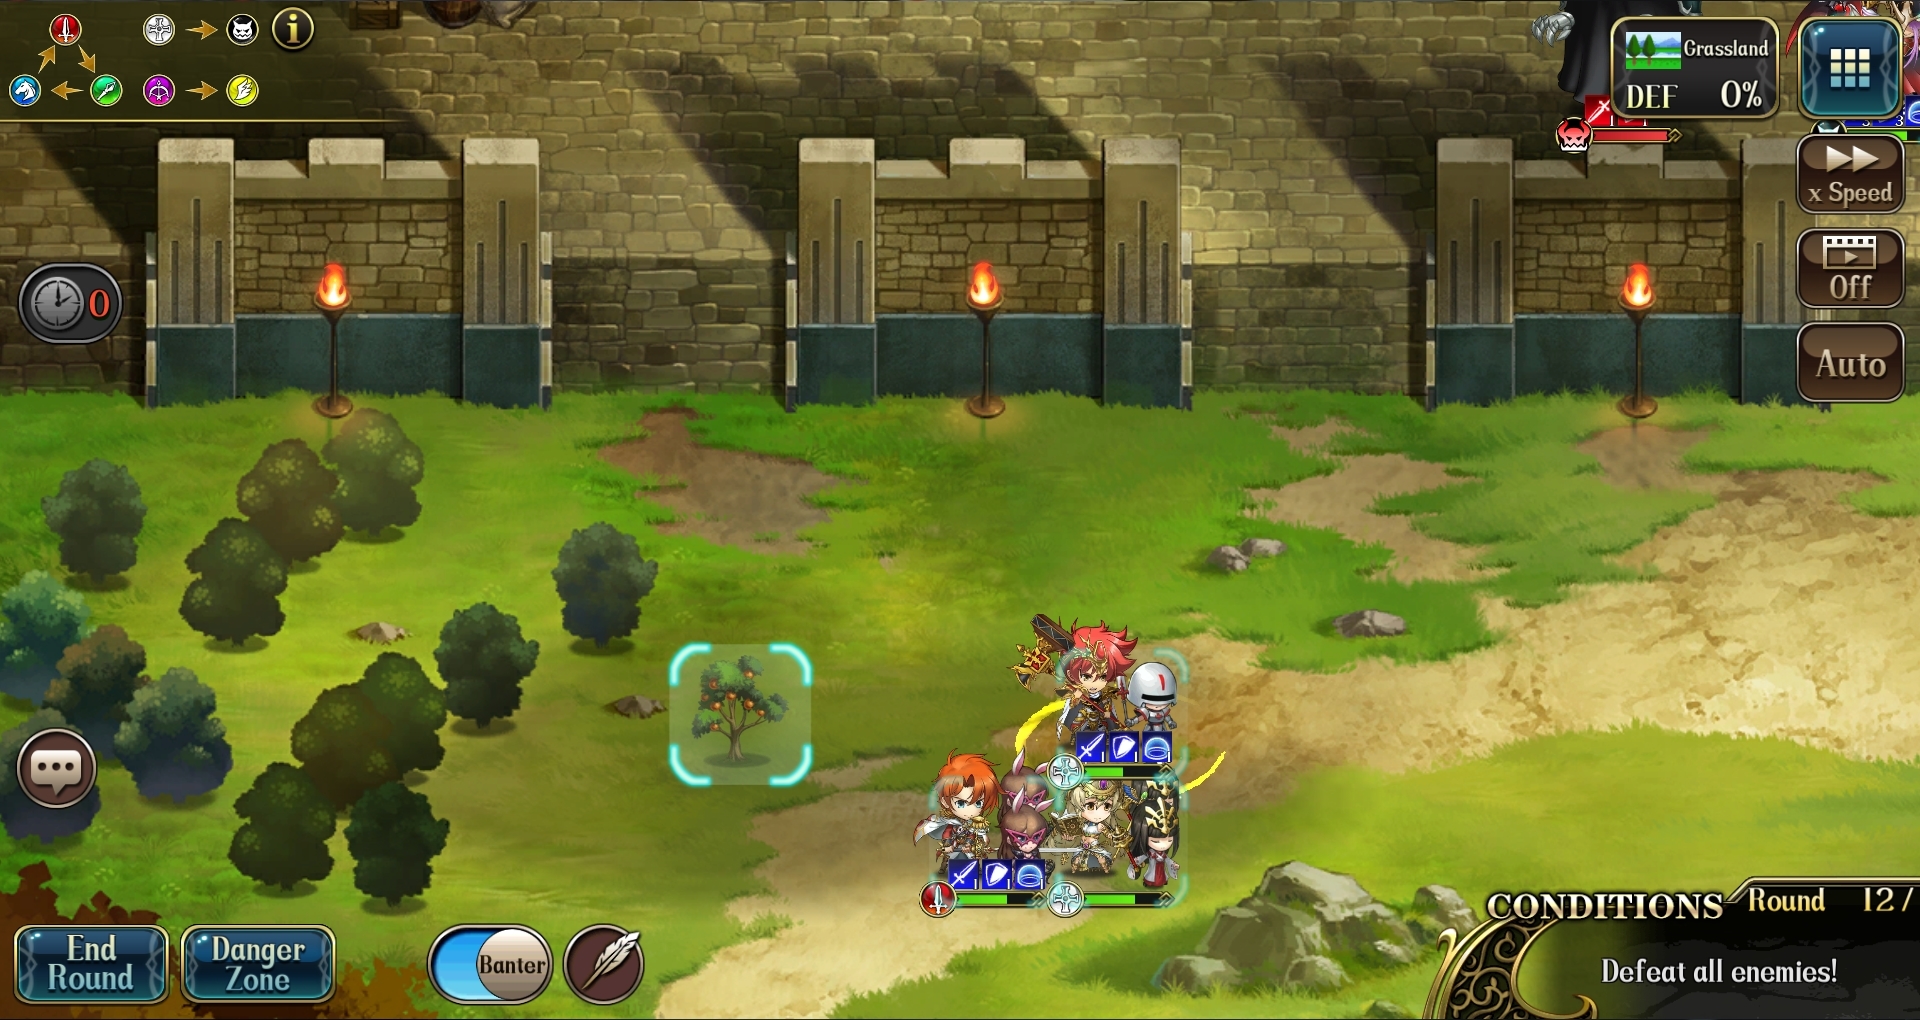
10-5 : Fruit tree on the left side of the map, south from Freya. (REWARD: 90,000 Gold)
10-6 : Blue torch at the Southwest corner of the map. (REWARD: 80 Trinity Crystals)
10-7 : Crack in the upper right side of the map inside the fortress. (REWARD: 3 Epic Crafter's Hammer)
10-8 : Stone plate in the top of the map. (REWARD: SSR Oath of Justice )
10-9 : Fruit tree in upper left of map. (REWARD: 2 Trinity vouchers )
Elite[]
10-1 : Stone in upper left. (REWARD: 100,000 Gold)
10-2 : Fruit tree in lower right of map (REWARD: 4 Epic Crafter's Hammer)
10-3 : Mailbox just south east of Ally NPC. (REWARD: 150 Orichalcum Ore)
10-4 : On the right side In the center black room, upper right corner tile. (REWARD: 90 Trinity Crystals)
10-5 : Earth lump on the left side of the map near the top left mountains. (REWARD: 100,000 Gold)
10-6 : Earth lump in front of one of the horses enemies. (REWARD: 4 Epic Crafter's Hammer)
10-7 : Blue flag in the top center room of the stronghold. (REWARD: 90 Trinity Crystals)
10-8 : Wooden Barricade on the last street between the houses on the left side of the town. (REWARD: Epic Martial Spirit)
10-9 : Scarecrow on top of the right side catapult enemy. (REWARD: 2 Trinity vouchers)
Langrisser III: Epilogue[]
Normal[]
11-1 : Magic stone on left side of the map on the mountains. (REWARD: 80 Trinity Crystals)
11-2 : Treasure Chest north of the yellow crystal. (REWARD: 4 Epic Crafter's Hammer)
11-3 : Earth lump between two pine trees on the north wall. (REWARD: 2 Trinity Vouchers )
11-4 : Puddle on left side of map between the mountains. (REWARD: 100 Trinity Crystals)
11-5 : Rose bush in the yard of the top left house of the map. (REWARD: 150 Orichalcum Ore)
11-6 : Statue on the left side of the map, behind Gickhardt. (REWARD: 100,000 Gold)
11-7 : Cupboard inside Olver's house. (REWARD: 4 Epic Crafter's Hammer)
11-8 : Statue on the top right side of the map. (REWARD: SSR Veil of Light)
11-9 : Barrel floating on the top left side of the map. (REWARD: 2 Trinity vouchers)
Elite[]
11-1 : Earth lump, to the right after climbing the first stairs. (REWARD: 100,000 Gold)
11-2 : Treasure Chest north of the yellow crystal. (REWARD: 4 Epic Crafter's Hammer)
11-3 : Earth lump between two pine trees on the north wall. (REWARD: 150 Orichalcum Ore)
11-4 : Barrel floating on the lake on the ride side of the map. (REWARD: 100 Trinity Crystals)
11-5 : Lily pad, south from the last house in the bottom right corner of the map. (REWARD: 100,000 Gold)
11-6 : Birdhouse in the mountains to the far north. (REWARD: 4 Epic Crafter's Hammer)
11-7 : Fruit tree on the top right side of the map, left from the 2 Hell Hounds. (REWARD: Epic Martial Spirit)
11-8 : Treasure Chest north of the left stairs. (REWARD: 100 Trinity Crystals)
11-9 : Piles of bones on the top right corner of the map. (REWARD: 2 Trinity vouchers)
Langrisser III: Final Chapter[]
Normal[]
12-1 : Suit of armor on the top right side of castle. (REWARD: 80 Trinity Crystals)
12-2 : Blue flame in the top right corner of the map near the Vampire. (REWARD: 4 Epic Crafter's Hammer)
12-3 : Blue standard left of fountain. (Reward: 5 SSR Bursting Heart Keys)
12-4 : Earth lump in the north near an infantry enemy soldier. (REWARD: 100 Trinity Crystals)
12-5 : Blue flame in the top right corner of the map near a mage. (REWARD: 150 Orichalcum Ore)
12-6 : A Crack on the mountain to the southeast of the map. (REWARD: 100,000 Gold)
12-7 : Blue flame to the right of Altemuller and Varna. (REWARD: 4 Epic Crafter's Hammer )
12-8 : A Crack on the floor to the left of Geier. (REWARD: Devil Axe)
12-9 : A Crack on the floor on the left platform from Bozel. (REWARD: 2 Trinity vouchers)
Elite[]
12-1 : A Crack on the floor to the left of the Vampire. (REWARD: 150,000 Gold)
12-2 : Blue flame in the top left corner of the map near the Vampire. (REWARD: 4 Epic Crafter's Hammer)
12-3 : Blue flag at the very top left side of the city map. (REWARD: 150 Orichalcum Ore)
12-4 : Wooden Barricade a bit north of Freya. (REWARD: 5 SSR Bursting Heart Keys)
12-5 : Suit of armor on the top left side of castle, near a wizard. (REWARD: 150 Orichalcum Ore)
12-6 : Fruit tree above Rag. (REWARD: 4 Epic Crafter's Hammer)
12-7 : Suit of armor on the top left side from Altemuller. (REWARD: Epic Martial Spirit)
12-8 : Blue flag at the very top right side of the map. (REWARD: 100 Trinity Crystals)
12-9 : A Crack on the floor on the right platform near the vampire bat. (REWARD: 2 Trinity vouchers)
Langrisser IV: Prequel[]
Normal[]
13-1 : A blue bucket south of Ricky. (REWARD: 5 Epic Crafter's Hammer)
13-2 : Rosebush in the woods to the right of the map, near an infantry enemy. (REWARD: 100 Trinity Crystals)
13-3 : Suit of armor in the woods to the right of the map, near the cavalry enemies. (REWARD: 2 Trinity vouchers)
13-4 : Lily pad on the left side of the river, behind some cavalry enemies. (REWARD: 150 Orichalcum Ore)
13-5 : Fruit tree in the middle of the Village, behind the Federation Captain. (REWARD: 150,000 Gold)
13-6 : Fruit tree on the left island where monsters spawn. (REWARD: 100 Trinity Crystals)
13-7 : Scarecrow inside the top right corner building. (REWARD: SSR Spirit Boots)
Elite[]
13-1 : A circle of rocks to the right of the south house. (REWARD: 180,000 Gold)
13-2 : Bird nest on the mountains at the top left corner of the map. (REWARD: 100 Trinity Crystals)
13-3 : Fruit tree on the left side of the map in the woods north from the 3 Cavalry enemies. (REWARD: 150 Orichalcum Ore)
13-4 : Barrel floating on the right side of the river. (REWARD: 5 Epic Crafter's Hammer)
13-5 : Lily pad at the center port on the water, north of the Federation Captain. (REWARD: 5 SSR Bond Keys)
13-6 : Suit of armor on the top of the map near the right side Catapult enemy. (REWARD: 100 Trinity Crystals)
13-7 : Scarecrow inside the top right corner building. (REWARD: Epic Martial Spirit)
Langrisser IV: Story[]
Normal[]
14-1 : Fruit tree on the northwest corner of the map. (REWARD: 6 Epic Crafter's Hammer)
14-2 : Blue flame to the left of King Caconsis. (REWARD: 100 Trinity Crystals)
14-3 : Suit of armor in the fort to right of Emily. (REWARD: 2 Trinity vouchers)
14-4 : Barrel floating on the top left side corner of Kreuger's Ship. (REWARD: 150 Orichalcum Ore)
14-5 : Earth lump under a tree on the left side of the Lake. (REWARD: 180,000 Gold)
14-6 : Seal in Upper Right of map. (REWARD: 100 Trinity Crystals)
14-7 : Barrel floating to the right where Valk is between some rocks. (REWARD: SSR Arcane Battlegarb)
Elite[]
14-1 : Fruit in the center of the map. (REWARD: 200000 Gold)
14-2 : Blue Flame in North East of map. (REWARD: 100 Trinity Crystals)
14-3 : Earth lump on the East of the map. (REWARD: 150 Orichalcum Ore)
14-4 : Banner on Kreuger's Ship. (REWARD: 6 Epic Crafting Hammers)
14-5 : Fruit in the North East of the map. (REWARD: 6 SSR Bond Keys)
14-6 : Rose bush southeast of the Lancer Generals. (REWARD: 100 Trinity Crystals)
14-7 : Cupboard next to King Caconsis. (REWARD: Epic Martial Spirit)
Langrisser IV: Epilogue[]
Normal[]
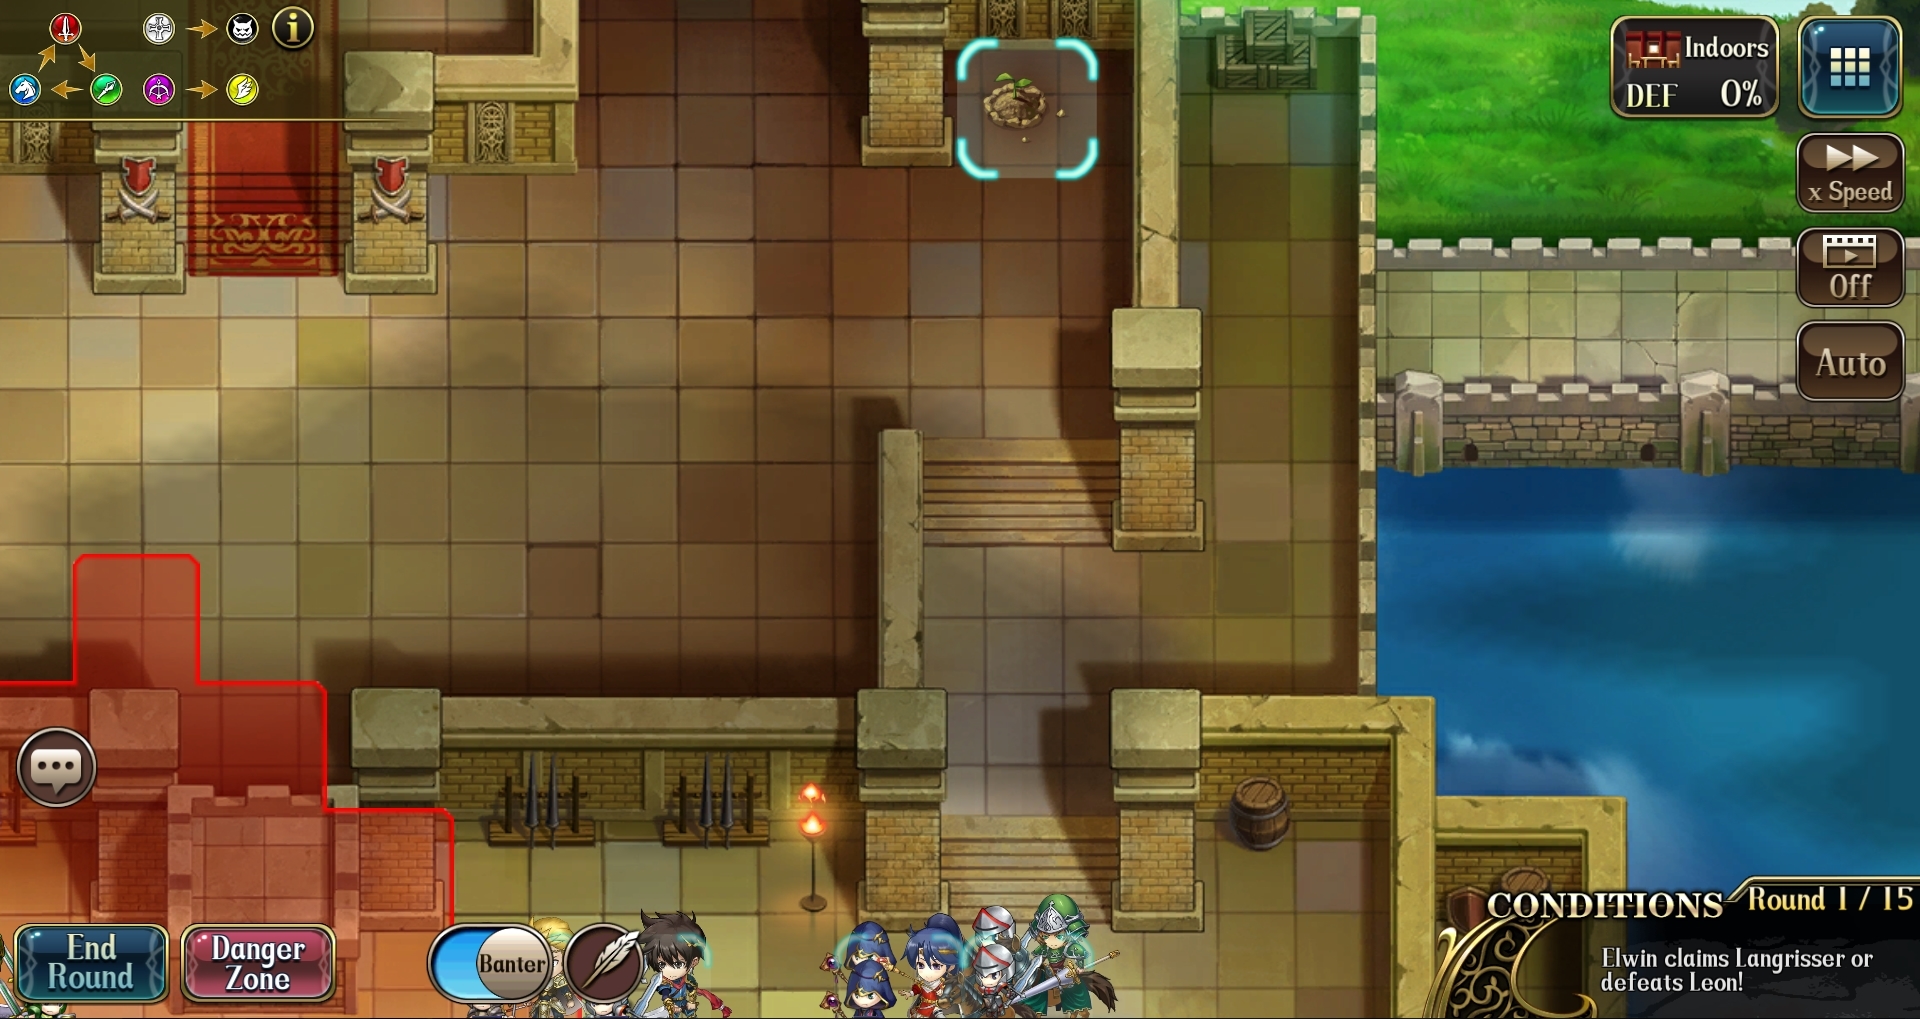
15-1 : Rose Bush in the center a bit north of Emily. (REWARD: 6 Epic Crafting Hammers)
15-2 : Floating Barrel right of the top ship. (REWARD: 150 Orichalcum Ore)
15-3 : Fruit Tree on the right small island. (REWARD: 2 Trinity Vouchers)
15-4 : Crack on the Floor in top left corner. (REWARD: 100 Trinity Crystals )
15-5 : Lily Pad on the top right of the map. (REWARD: 200,000 Gold )
15-6 : Lily Pad on the bottom left of the map. (REWARD: 3 Rare Enchant Gift Packs)
15-7 : Fruit Tree on the south bank of the river. (REWARD: SSR Yggdrasil Branch)
Elite[]
15-1 : Lily Pad top of the map. (REWARD: 220,000 Gold)
15-2 : Suit of armor on the mast of the top ship. (REWARD: 7 Epic Crafting Hammers)
15-3 : Floating Barrel in the bottom left. (REWARD: 150 Orichalcum Ore)
15-4 : Chest in top left corner. (REWARD: 100 Trinity Crystals)
15-5 : Conch in the sea in the bottom of the map. (REWARD: 6 SSR Bond Keys)
15-6 : Fruit Tree in the bottom right. (REWARD: 7 Epic Crafting Hammers)
15-7 : Chest in the bottom right. (REWARD: Epic Martial Spirit)
Langrisser IV: Final Chapter[]
Normal[]
16-1 : Chest in the bottom right of the castle. (REWARD: 150 Orichalcum Ore)
16-2 : Rose Bush top left of the castle. (REWARD: 100 Trinity Crytals)
16-3 : Lily Pad in the bottom. (REWARD: 180,000 Gold)
16-4 : Pile of Bones in the center of the map. (REWARD: 7 Epic Crafting Hammers)
16-5 : Pile of Bones in the bottom right. (REWARD: 2 Trinity Crystals)
16-6 : Chest in the top. (REWARD: SSR Vidar's Rose)
Elite[]
16-1 : Blue Torch in the top right corner of the castle. (REWARD: 6 SSR Bond Keys)
16-2 : Floating Barrel on the top right. (REWARD: 6 SSR Hammers)
16-3 : Suit of Armor in the top room. (REWARD: 150 Orichalcum Ore)
16-4 : Flag in the top left room. (REWARD: 240,000 Gold )
16-5 : Pile of Bones in the bottom left. (REWARD: 8 SSR Hammers)
16-6 : Statue. (REWARD: Epic Martial Spirit)
Langrisser V: The End Of Legend[]
Normal[]
17-1 : Chest in the bottom left of the map. (REWARD: 180,000 Gold)
17-2 : Lily Pad in the left pond. (REWARD: 6 SSR Hammers)
17-3 : Rose Bush. (REWARD: 100 Trinity Crystals)
17-4 : Flag in the central room. (REWARD: SSR Pale Staff)
17-5 : Lily Pad north of the river. (REWARD: 2 Trinity Vouchers)
17-6 : Floating Barrel right of fort. (REWARD: 150 Orichalcum Ore)
Elite[]
17-1 : Chest in the bottom right of the map. (REWARD: 6 SSR Bond Keys)
17-2 : Earth Lump top of northern bridge. (REWARD: 150 Orichalcum Ore)
17-3 : Flag left of the bridge. (REWARD: 240,000 Gold)
17-4 : Rose Bush near the top left statue. (REWARD: 6 SSR Bond Keys)
17-5 : Fruit Tree left of the river in the south. (REWARD: 8 SSR Hammers)
17-6 : Statue east of the mountain . (REWARD: Epic Martial Spirit)
Langrisser V: The End Of Legend - vol II[]
Normal[]
18-1 : Pile of Bones in northern room. (REWARD: 180,000 Gold)
18-2 : Floating Barrel west of the bridge. (REWARD: 100 Trinity Crystals)
18-3 : Chest on the central ship . (REWARD: 150 Orichalcum Ore)
18-4 : Pile of Bones in the northwest. (REWARD: 6 SSR Hammers)
18-5 : Flag in the southeastern corner of the island. (REWARD: 2 Trinity Vouchers)
18-6 : . (REWARD: SSR Fury of Tyr)
Elite[]
18-1 : Flag in the southeastern room. (REWARD: 240,000 Gold)
18-2 : Fruit Tree between the ravine and the road. (REWARD: 150 Orichalcum Ore)
18-3 : Rose Bush north east of the ship. (REWARD: 6 SSR Bond Keys)
18-4 : Earth Lump near the eastern house. (REWARD: 8 SSR Hammers)
18-5 : Pile of Bones in the east. (REWARD: 6 SSR Bond Keys)
18-6 : Bird Nest in the scaffolding, in the middle of the map. (REWARD: Epic Martial Spirit)
Langrisser V: The End Of Legend - vol III[]
Normal[]
19-1 : Lily Pad in the northwest. (REWARD: 100 Trinity Crystals)
19-2 : Flag top of the ship. (REWARD: 180,000 Gold)
19-3 : Suit of Armor in the north of the fort. (REWARD: 6 SSR Hammers)
19-4 : Chest in the northwest of the fort. (REWARD: SSR Scepter of Divinity)
19-5 : Floating Barrel in the centre. (REWARD: 2 Trinity Vouchers)
19-6 : Flag in the east room. (REWARD: 150 Orichalcum Ore)
Elite[]
19-1 : Furniture in southeast room. (REWARD: 6 SSR Bond Keys)
19-2 : Crack on the floor of the ship in the northwest. (REWARD: 150 Orichalcum Ore)
19-3 : Floating Barrel in the north. (REWARD: 240,000 Gold)
19-4 : Flag in the northeast end of the fort. (REWARD: 6 SSR Bond Keys)
19-5 : Suit of Armor in the north. (REWARD: )
19-6 : Flag in the top left corner. (REWARD: )
| Stage | Name | Treasure | |
|---|---|---|---|
| Normal | Elite | ||
| 1-1 | Prologue | 15 Crystal | 25 Crystal |
| 1-2 | Setting Off | Speed Boots | Trinity Voucher |
| 1-3 | Temple of Light | 3x Friendship Voucher | 3x Friendship Voucher |
| 1-4 | Battle at Kalxath | Trinity Voucher | Rare Crafter's Hammer |
| 1-5 | In Flames | Trinity Voucher | Trinity Voucher |
| 1-6 | Holy Ground Reitel | Life Staff | 30 Crystal |
| 1-7 | Demon's Sorrow | 25 Crystal | Rare Martial Spirit |
| 2-1 | Suspension Bridge | 25 Crystal | 35 Crystal |
| 2-2 | Old Warrior Aaron | Swift Helmet | Trinity Voucher |
| 2-3 | Vargas, the Valiant | Rare Crafter's Hammer | Rare Crafter's Hammer |
| 2-4 | Langrisser | Greaves | 35 Crystal |
| 2-5 | Ironwall Knights | 30 Crystal | Dragon Scale Armor |
| 2-6 | Emperor Bernhardt | 35 Crystal | 40 Crystal |
| 2-7 | Siege at the Port | Dragon Scale Armor | Trinity Voucher |
| 3-1 | Engaging Imelda | 35 Crystal | 2x Rare Crafter's Hammer |
| 3-2 | Dark Princess | Trinity Voucher | 45 Crystal |
| 3-3 | Alhazard's Revival | Rare Crafter's Hammer | Ghost Robe |
| 3-4 | The Sealed Key | Feathered Light Armor | 45 Crystal |
| 3-5 | Vengeance | 40 Crystal | Trinity Voucher |
| 3-6 | Mightiest Knight | Trinity Voucher | 2x Rare Crafter's Hammer |
| 3-7 | A Legendary Epilogue | Rare Crafter's Hammer | 45 Crystal |
| 4-1 | Forward | Trinity Voucher | Elven Bow |
| 4-2 | WANTED: Dead or Alive | Ghost Mask | 45 Crystal |
| 4-3 | A Veteran Blocking the Way | 45 Crystal | Trinity Voucher |
| 4-4 | Holy Sword of Legend | 2x Trinity Voucher | 2x Rare Crafter's Hammer |
| 4-5 | A Rueful Pursuer | 50 Crystal | 50 Crystal |
| 4-6 | Spare None | 2x Trinity Voucher | Scryer |
| 4-7 | Defense at the Iron Wall | Mithril Armor | 50 Crystal |
| 5-1 | The Fall of Kalxath | 50 Crystal | Trinity Voucher |
| 5-2 | Chaos | Trinity Voucher | 3x Rare Crafter's Hammer |
| 5-3 | Sister Sonya | Rare Crafter's Hammer | 60 Crystal |
| 5-4 | Dark Prince | Crystal Anklet | Feathered Hat |
| 5-5 | Scattered Stars on the Sea | 60 Crystal | 60 Crystal |
| 5-6 | The Ancient City of the Twin Towers | 2x Trinity Voucher | Trinity Voucher |
| 5-7 | Final Battle | 2x Rare Crafter's Hammer | Epic Crafter's Hammer |
| 6-1 | Escape From the Capital | 2x Trinity Voucher | 70 Crystal |
| 6-2 | Head to Salrath | 60 Crystal | Sentinel Emblem |
| 6-3 | Raid | 2x Rare Crafter's Hammer | 70 Crystal |
| 6-4 | Forest of the Dead | Rune Axe | Trinity Voucher |
| 6-5 | Imperial Guards | 2x Rare Crafter's Hammer | 2x Epic Crafter's Hammer |
| 6-6 | Siege of Baldea City | Assault Ring | 80 Crystal |
| 7-1 | Brave of the Fortress | 60 Crystal | 80000 Gold |
| 7-2 | Pursuit | 2x Trinity Voucher | 2x Trinity Voucher |
| 7-3 | Rall River Torrent | Epic Crafter's Hammer | 80 Crystal |
| 7-4 | City on the Lake | 60 Crystal | Twilight Armor |
| 7-5 | Dalsis City | 50000 Gold | 80 Crystal |
| 7-6 | Twin Towers Castle | Epic Crafter's Hammer | 100x BrillianceMithralStone |
| 7-7 | Stone Statue Town | 100x BrillianceMithralStone | 2x Epic Crafter's Hammer |
| 8-1 | Wolf Enclosure | 2x Trinity Voucher | 2x Trinity Voucher |
| 8-2 | Howl of the Evil Dragon | Aeneas' Helmet | 80 Crystal |
| 8-3 | In the Dark | 70 Crystal | 3x Epic Crafter's Hammer |
| 8-4 | Velzeria, the Forbidden Land | Epic Crafter's Hammer | 90000 Gold |
| 8-5 | In the Ruins | 70000 Gold | Epic Martial Spirit |
| 8-6 | Underground Temple | 2x Trinity Voucher | 2x Trinity Voucher |
| 8-7 | Dark Seal | 70 Crystal | 80 Crystal |
| 9-1 | Tiseo's Fall | Epic Crafter's Hammer | 90000 Gold |
| 9-2 | Chaos in Laffel | 70000 Gold | 3x Epic Crafter's Hammer |
| 9-3 | Sorrowful Swordsman | 150x BrillianceMithralStone | 150x BrillianceMithralStone |
| 9-4 | General Geier | Dark Crown | 80 Crystal |
| 9-5 | General Emerick | 70 Crystal | 90000 Gold |
| 9-6 | Double Enemies | 80000 Gold | 3x Epic Crafter's Hammer |
| 9-7 | Hilltop Reunion | 2x Epic Crafter's Hammer | Epic Martial Spirit |
| 9-8 | Southern Lushiris Gate | 2x Trinity Voucher | 80 Crystal |
| 9-9 | Wizard Attack | 70 Crystal | 2x Trinity Voucher |
| 10-1 | 灼热的仪式 | 2x Epic Crafter's Hammer | 100000 Gold |
| 10-2 | 妖女 | 80 Crystal | 4x Epic Crafter's Hammer |
| 10-3 | 贤者法贝尔 | 2x Trinity Voucher | 150x BrillianceMithralStone |
| 10-4 | 圣兽 | 150x BrillianceMithralStone | 90 Crystal |
| 10-5 | 叛逃者迪欧斯 | 90000 Gold | 100000 Gold |
| 10-6 | 破邪之剑 | 80 Crystal | 4x Epic Crafter's Hammer |
| 10-7 | 佯攻作战 | 3x Epic Crafter's Hammer | 90 Crystal |
| 10-8 | 拉菲尔夺还作战 | Oath of Justice | Epic Martial Spirit |
| 10-9 | 超古代兵器 | 2x Trinity Voucher | 2x Trinity Voucher |
| 11-1 | 男子汉波鲁兹 | ||
| 11-2 | 天空之战 | ||
| 11-3 | 美丽之都拉卡西亚 | ||
| 11-4 | 新的战争 | ||
| 11-5 | 再会死灵使 | ||
| 11-6 | 元帅的抉择 | ||
| 11-7 | 光与暗 | ||
| 11-8 | 疑惑 | ||
| 11-9 | 变幻的弗拉基亚 | ||